edit video

Wondershare Filmora Review: All Details and Alternatives (2020)

It’s not a surprise why many people look for dedicated video editing software. As we already know, video marketing is booming and video contents impact our lives. However, no one is naturally good at creating a perfect video in one go. And, even if you can make it, it’s always better to add some effects, sounds, and filters to videos, isn’t it? This is where Wondershare Filmora comes in clutch.

Today in this article we will give a full and objective Wondershare Filmora Review to find out whether the video editing software is definitely worth your try.

What is Wondershare Filmora?

Wondershare Filmora is an elegant video editing software that is available for both Mac and Windows. This tool comes from Wondershare, an excellent developer behind so many popular apps like Dr.fone, Recoverit, and PDFelement. It should be noted that Wondershare Filmora is not only the best video editing software, but also a professional slideshow maker.

Product details:

Price Free and Paid
Developer Wondershare
Platform Desktop: Mac and Windows

Mobile: iOS and Android

Customer types Small business, Large enterprises, Medium business
Advantages
  • Easy to use
  • Can add effects, filters, texts, transitions and slow motion
  • Export videos with up to 4K resolution
  • Up to 100 Video Tracks
  • PC/Mac Cross-Compatibility
Disadvantages
  • There is a watermark on your videos using the free version.
  • No interface skin change in the new updates.
  • It’s too simple for advanced users.

Wondershare Filmora Review: Pro Features

Nowadays, the internet is full of different video editing software claiming to give you great performance. Before you choose the right one you may consider many things like price, functions, interface etc. Luckily, Wondershare Filmora has all the features you may like.

Now let’s have a closer look at Wondershare Filmora’s features.

User-friendly Interface

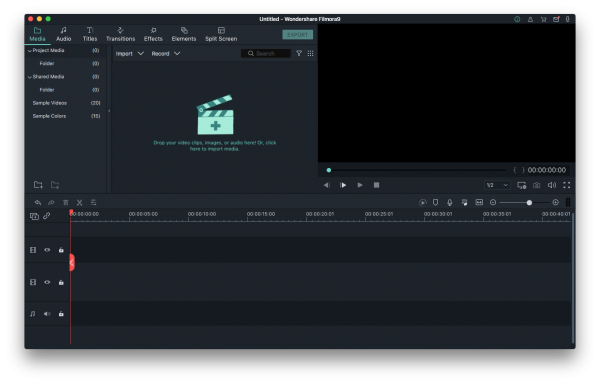
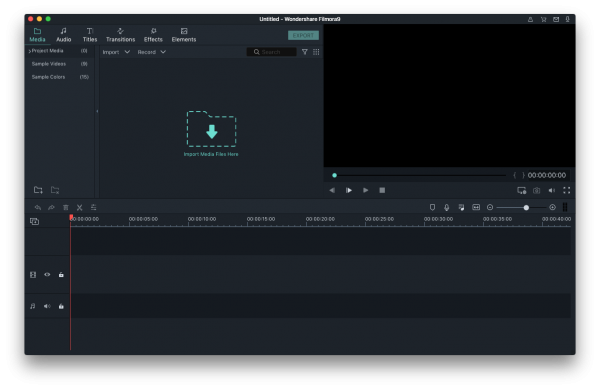
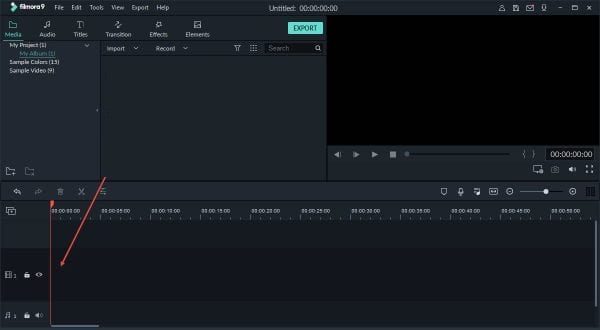
If it’s the first time you get started with this software, you must be fall in love with its simple interface. With all tools and functions such as text, transitions, filters and export available on the main interface, you can easily edit your video without any additional complicated settings, though it’s not so friendly for touch-screen.

Text and Titles

You can edit the color, font and size of text, type vertically when adding text and titles to your videos. Furthermore, it allows you to use titles, openers, subtitles, end credits. Each is editable right in the preview window.

Filters and Overlays

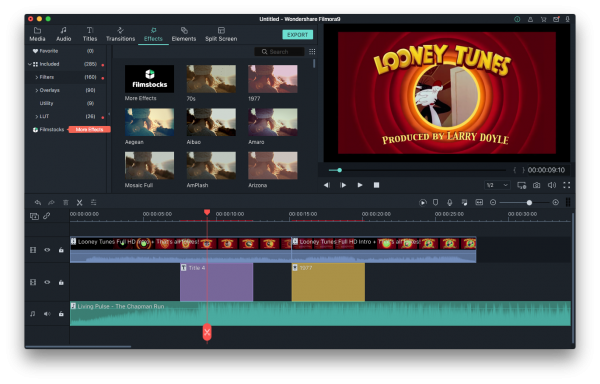
Filmora allows you to add as many as different filters or overlays as you like to make your video more interesting and attractive. Just click Effects on the top menu and then select the filters or overlays that you want to add to your project. Note that all filters and overlays are sorted by subject category, so you can easily find it.

Music and Audio

Wondershare Filmora offers a one-stop service for music and sound effects. It has a music library for free. They’re organized into categories like Young & Bright, Tender & Sentimental, Rock, Folk, Electronic. You can choose some good ones from the options and also can add music files from your own music library.

Split Screen

Split screen is becoming a popular technique in video creations. In the latest version of Filmora, it has the Split Screen Effect, making two or more videos displaying on one screen. This tool is useful when you want to show different angled video at once, compare two clips or images, or combine two or more videos into one.

Aspect Ratio

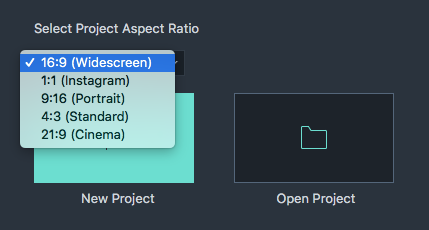
This is the new function added in the latest version. When you open Filmora, you are allowed to choose the Project Aspect ratio in the start interface, you can choose from 16:9 (widescreen), 4:3 (standard), 1:1 (Instagram), 9:16 (portrait). 1:1 and 9:16 are most popular on social media sharing nowadays.

Green Screen Effect

Make a green screen will make your creation looks like more professional. Fortunately, Filmora gives you the chance to make a green screen to your video. What’ more, the green screen effect can not only change color as green or blue but any color you like to create. 

Built-in Screen Record

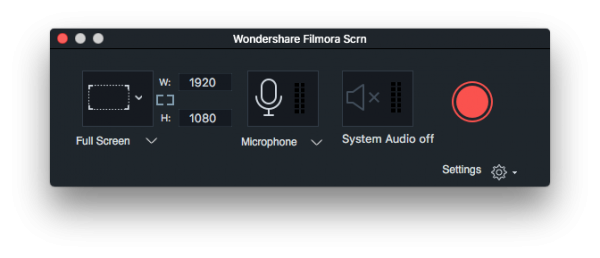
Wondershare Filmora provides just what users want to make their videos with a screen recording option, which is not common in some other similar video editing software. Otherwise, if you use Wondershare Filmora, it can save your cost on a screen recorder as you can use Filmora’s built-in screen record.

Export and Share

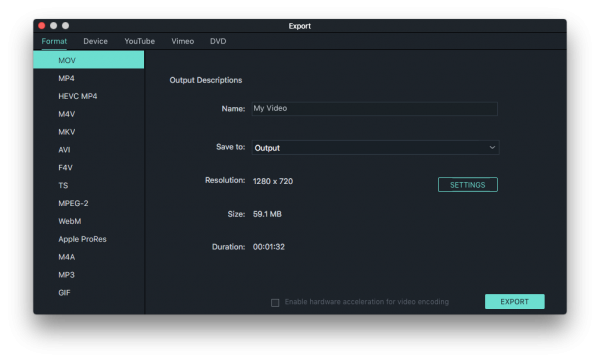
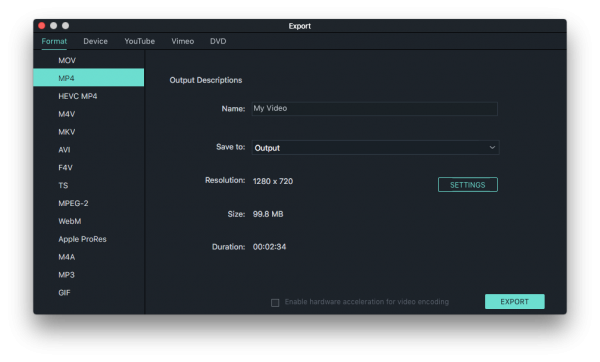
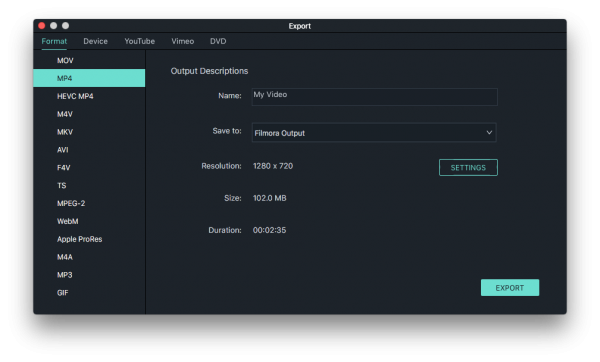
This tool has many output options including MP4, MKV, MP3, MOV, WMV and GIF etc. When exporting your video, you can select the quality settings: Best, Better and Good. Besides, you can share your video to social platform like YouTube, Vimeo, Facebook or burn to DVD.

A Full Guide on How Wondershare Filmora Works?

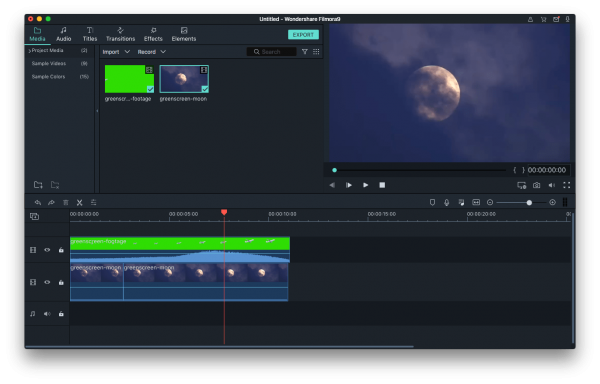
In the following step-by-step process, we will give you a full guide on how to edit a video with Wondershare Filmora. If you have downloaded the latest version of the software on Mac or Windows, just open it and follow the tutorial below. If you haven’t, you can get it by hitting the download button.

Free Download Win Filmora
 
Free Download Mac Filmora

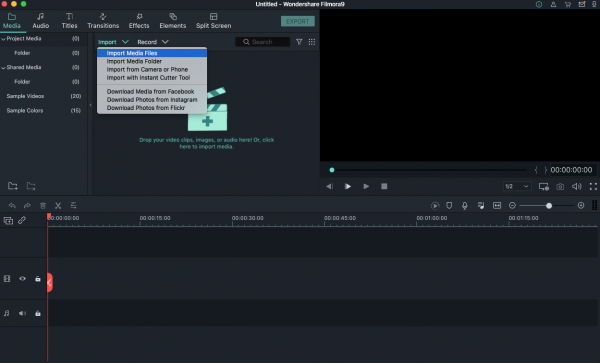
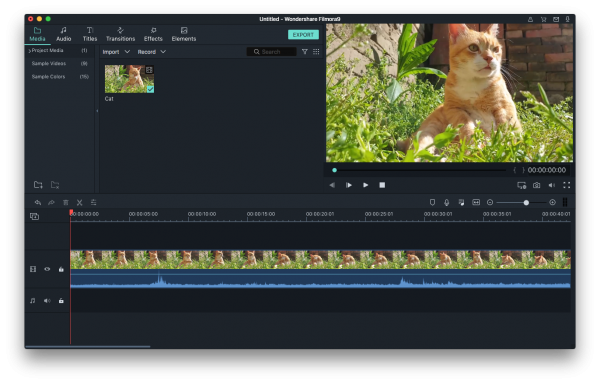
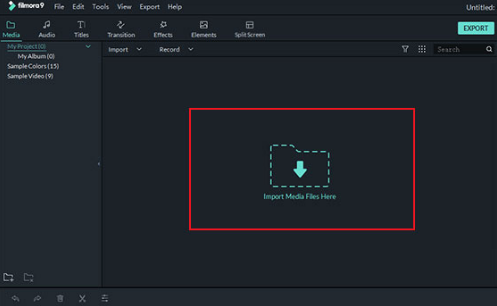
1. After you open it, select the Project Aspect Ratio as you like. Then click New Project.2. Upload video by clicking the Import icon or just drop video to the library.

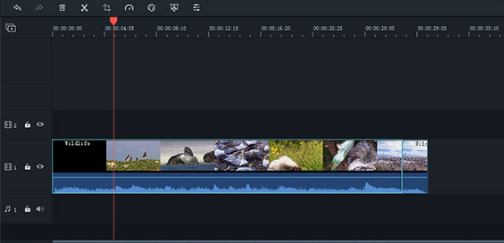
3. Then comes to Editing. You can do some basic editing and then apply filters or overlays to it, or add some background music, open titles, end-credits or subtitles to your video according to your requirements.

4. After making sure that there is nothing more to be edited, click on the Export button. And then choose the output format or share to YouTube and others.

Wondershare Filmora FAQs 

1. Is Wonderhsare Filmora a virus?

Absolutely not. Before downloading any software, the first thing you need to be sure of is if it is safe to download. You do not have to worry about this when it        comes to Wondershare Filmora. It is a safe to download, in my test.

2. How much does Wondershare Filmora cost?

It has different pricing plan for individuals, businesses, and education. The details are outlined below to help you choose which plan is best meet your needs.

 Filmora Pricing Plans

Plan Price Service
Free Trial  Free Watermark, No tech support
Individual Annual Plan $44.99/year All features, Updates, No watermark, Tech support
Individual Lifetime Plan $69.99/one-time fee Annual plan+Unlimited downloads from filmstocks, New effects every month
Annual Bundle Plan $104.87/year Annual plan+Unlimited downloads from filmstocks, New effects every month
Basic Business Plan $12.99/month/annual billing Annual plan+Permission for company use, Access to filmstocks free library,  No attribution required, Multi-User control,Volume discount
Standard Business Plan $24.99/month/annual billing Basic business plan+1-1 Sales support, Flexible payment options
Premium Business Plan $57.99/month/annual billing Basic business plan+1-1 Sales support, Flexible payment options
Student Plan $7.99/month All features, All updates, No Filmora watermark, Tech support
Educator Plan Ask for seller According to the pricing plan

3. Is Wondershare Filmora worth it?

Overall, Wondershare Filmora is a cost-effective video editing software with lots of wonderful features and it can work on both Mac and Windows. So, if you can accept the price and like its features, it is definitely worth a try.

4. Does Filmora have a watermark?

The watermark only exists in the free trial version. If you want to remove it, you have to pay for the other versions.

5. Is Wondershare Filmora legit?

Yes, it’s legit. Anyway, Wondershare is a legit company distributing its products worldwide through its members. It has existed for more than 10 years which is longer than many software companies today.

Wondershare Filmora Alternatives

If you still are not satisfied with Wondershare Filmora whether its interface or functions then here are 7 alternatives that will allow you to make a good video.

1. iMovie

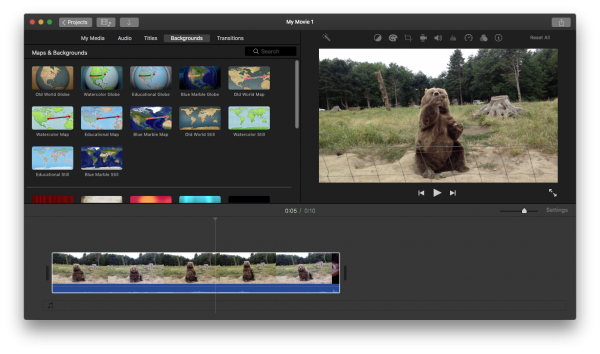
If you use Mac, iMovie, an Apple’s built-in video editing app, is your guy.  It allows users to input videos from various sources including DVD encoded files, digital video cameras, and even images. In addition, it also offers an option to add animated titles, color filters, special effects to your video like green screen. Its simplicity appeals most of novice. But for most advanced users, they just find it hard to meet their editing demands.

2. Movavi Video Editor Plus

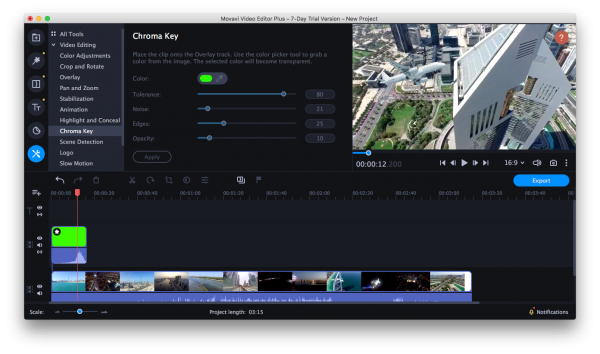
If you are a totally beginner, Movavi Video Editor Plus should be a good choice for you. With a really intuitive interface, you can easily get the function you need at a glance. Otherwise, ease-to-use does not mean non-professional, besides the basic editing skills (e.g. trim, merge, rotate, chroma key, slow motion, etc.), it also provides a variety of built-in visual effects (e.g. filters, titles and transitions) to rich your video.

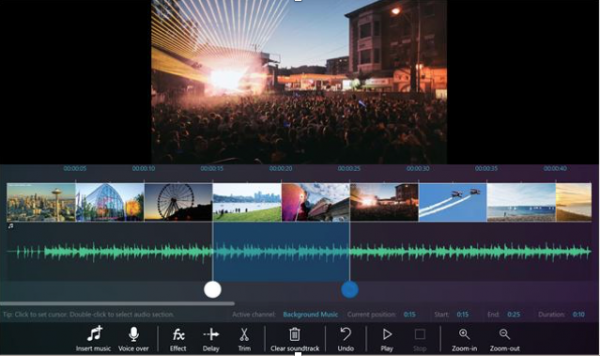
3. Windows Movie Maker

Windows Movie Maker is a similar program to Filmora. It has excellent features, such as timeline narration, transition overlays, animations, and extensive audio options. Unfortunately, it’s no longer available to download now since Microsoft discontinued to update this software in 2017.

4. Davinci Resolve

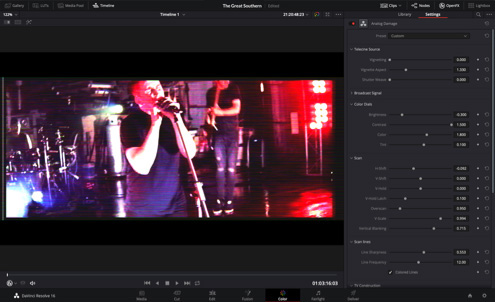
DaVinci Resolve 16 is the world’s only solution that combines professional 8K editing, color correction, visual effects and audio post production all in one software tool. It designed specifically for editors who works on high end fast turnaround work such as television commercials, news cutting. Furthermore, it has version for Mac, Windows and Linux.

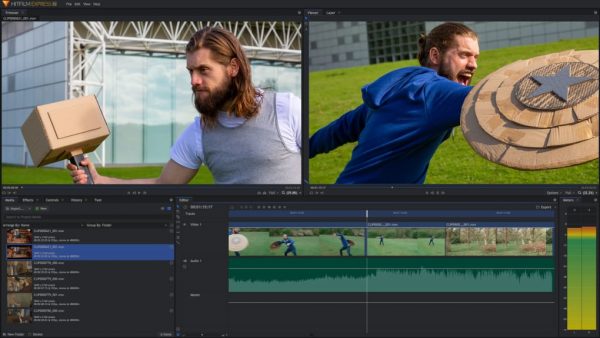
5. HitFilm Express

Available for both Mac and Windows, HitFilm Express is a free video editing software combine editing and VFX (Visual Effects). It comes with over 140 inbuilt effects, transitions and presets. If you are a special effects amateur, then HitFilm Express is just the thing for you.

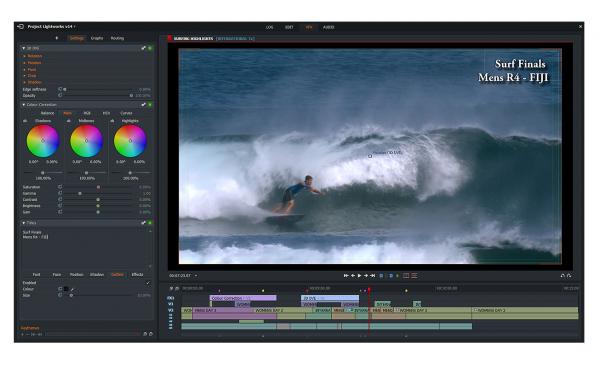
6. Lightworks

Lightworks has been in the field of film editing for over 25 years. Lightworks makes it all possible to make video for social media, YouTube or for a 4K film project. It is integrated with advanced tools like drag and drop, timeline editing, trimming, audio & video FX (special effect). With a quite intuitive interface, users have no issues importing images, audio or other clips to a video project and export also goes smoothly.

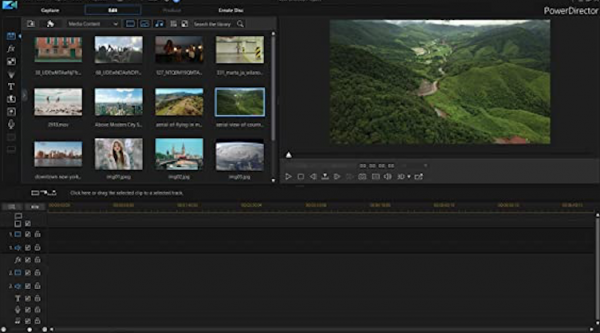
7. PowerDirector

PowerDirector is the fastest and most full-featured consumer-level video editing software. However, the quality is not so good as other competitors and it doesn’t offer many of the advanced video editing features its competitors do. If you prefer to save time while creating a project, you’re exactly the kind of person that PowerDirector was designed for. But if you go for high-quality videos, you’d better consider other competitors such as Wondershare Filmora.

Final Verdict

I hope this Wondershare Filmora review will help you make the right decision. So far, I am impressed with Filmora’s powerful features and intuitive interface. More importantly, Filmora has updated constantly to keep with users demands.


Related Post

By |2020-10-15T17:15:10+08:00June 18th, 2020|Tags: , |

Best 9 Windows Movie Maker Alternative with No Watermark (2020 Update)

Windows Movie Maker is regarded as the king video creation and editing software with all basic functions in its time. Unfortunately, as Microsoft discontinued to update this software in 2017, it’s no longer available to download now and no one can make the risk of downloading it on some silly websites. In this case, you’ll have no other choice but to seek out Windows Movie Maker alternative.

Fear not, we have got your covered within this article. Here we have thoroughly checked almost hundreds of Windows Movie Maker Alternatives and listed the best Windows Movie Maker alternative among them. With these programs, you can easily make videos to your needs.

Navigation of contents:

Part 1: Why is Windows Movie Maker Discontinued?

Common Reasons Windows Movie Maker Fails

Windows Movie Maker is a useful movie-making app when it comes to creating videos. Apart from that, it has excellent features, such as timeline narration, transition overlays, animations, and extensive audio options. But why is Window Movie Maker discontinued?

To explain more of these, continue reading below to get the reason.

  • Easy to crash. People who used Windows Movie Maker know that it is known for suffering from the frequent freeze and crashes. So, you should make sure to save it often and It’s not possible to create the complex videos.
  • Limited video or audio tracks. It offers only one track available at one time. So, if you want to add another audio track, you should wait after the video is finished.
  • Not available for effects. As it has only one track, you cannot use the effects pre-installed in this program like adding a green screen effect.

Part 2:
What Can I Use Instead of Windows Movie Maker?

1. Windows Movie Maker Alternative for Mac and Windows 10/8/7

#1 Wondershare Filmora9 (Mac, Windows)

When it comes to the best Windows Movie Maker alternative, Filmora9 is your first choice. It can work on both Mac and Windows. It allows you to cut, crop, split, add titles, apply music, make a green screen on your videos. The best thing about it is that it has no file size limit and has up to 100 video tracks. Aside from video editing, it is also capable of converting video to other formats, like AVI, MOV, WMV, GIF and many more.

To accurately navigate Filmora9, follow the steps given below.

Step 1: Access to the tool 

First, hit the download buttons provided below to get Filmora on your Mac or Windows computer. Once installed, run the program.

Free Download Win Filmora
 
Free Download Mac Filmora

Step 2: Import files 

You can easily import clips or videos into Filomra with its import feature, which allows you to search through the devices on your Mac or Windows and pick the files you need. More simply, you can drag a file straight from the finder into the Timeline or Media library of Filomra.

Step 3: Edit Video 

Once the file is successfully added, you can edit the video according to your requirement, split, trim, adjust speed, rotate, add watermark or slow motion and so on. Further, for pro features you can go to the upper bar: Audio, Titles, Transitions, Effects, Elements.

Step 4: Export and Select Your Desired Format 

After it finishes editing, click “Export” and then choose your preferred format. Also, you can share it to YouTube and other social media platforms.

Pros:

  • Conversion of the video into different formats
  • Friendly user interface
  • Available for Mac and Windows
  • Convert Video to GIF is possible

Cons:

  • Watermark appears on the video with its free trial version.

#2 Microsoft Photos (Windows 10 only)

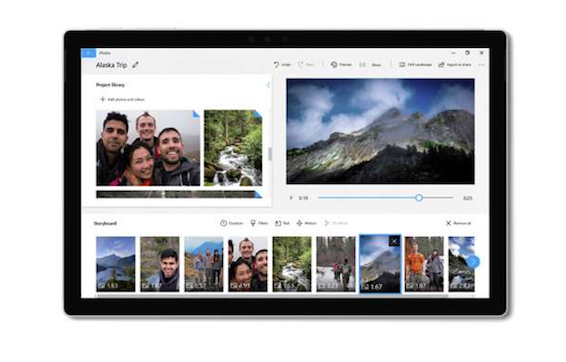
Thanks to Video Editor, which is included in Microsoft Photos, you can still make videos on Windows 10 computer. It allows Windows 10 users to do some basic editing tasks such as trimming, rotating, slow motion, text, add filters, background music, and even 3D effects on their Video. It’s definitely a great Windows Movie Maker alternative designed for Windows 10, so we often call it the Movie Maker for Windows 10.

Pros:

  • It’s completely free
  • It has options to sync to OneDrive and to back up project
  • Smooth and flexible

Cons:

  • It works only on Windows 10
  • No multi-track timelines

#3 Videopad Video Editor (Windows, Mac)

Videopad Video Editor is one of the best Windows Movie Maker alternative available for both Windows and Mac. With this, you can edit your videos such as can add effects, subtitles as well as insert transitions in the video. Besides, it supports all popular video formats. All in all, it is a Windows Movie Maker alternative that is worth trying at least.

Pros:

  • It is relatively easy to use
  • Supports all video formats
  • Has an option to export videos in 4K

Cons:

  • The interface is a little bit old-fashioned
  • Not 100% free-it only offers a free version for “non-commercial use”
  • Not suitable for advanced users

#4 Avidemux (Windows, Linux, Mac)

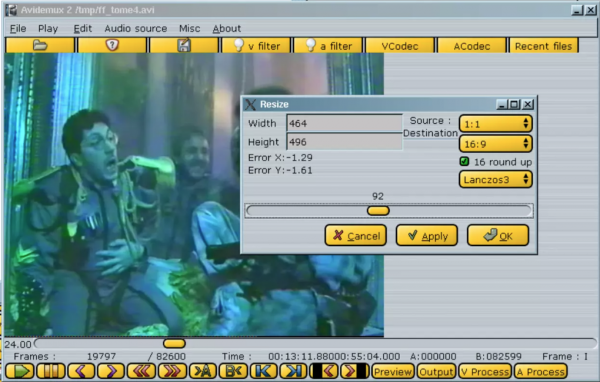
Avidemux is an essential Windows Movie Maker alternative that is capable of cutting, filtering, and encoding projects. It has a lot of video and audio filter so we can adjust all transitions or add subtitles easily. To my surprise, this program allows users to adjust the brightness and contrast, hue and saturation, reduce noise, sharpen edges, and more. Plus, it supports many file types including AVI, DVD compatible MPEG files, MP4 and ASF.

Pros:

  • Lightweight, simple to use
  • Compatible with Windows, Mac OS and Linux
  • Free

Cons:

  • Cannot combine videos of different dimensions
  • Can only upload one video clip at a time

#5 Videolan Movie Creator (Windows, Linux, Mac)

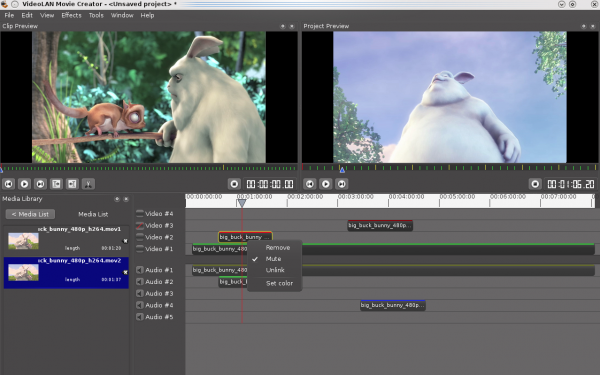
This is also a free Windows Movie Maker alternative and it is cross-platform, that is, besides Windows, it is also compatible with Linux and Mac. Its simple user interface claims that it can edit videos in one click method. Though it is free, there does exist powerful features that a few software offers. It supports almost all video and audio formats compare to other Windows Movie Maker alternative.

Pros:

  • Free and open-sourced
  • Support all platforms
  • Intuitive interface

Cons:

  • The app crashed sometimes

2. Windows Movie Maker Alternative for Linux

#1 Openshot (Windows, Linux, Mac)

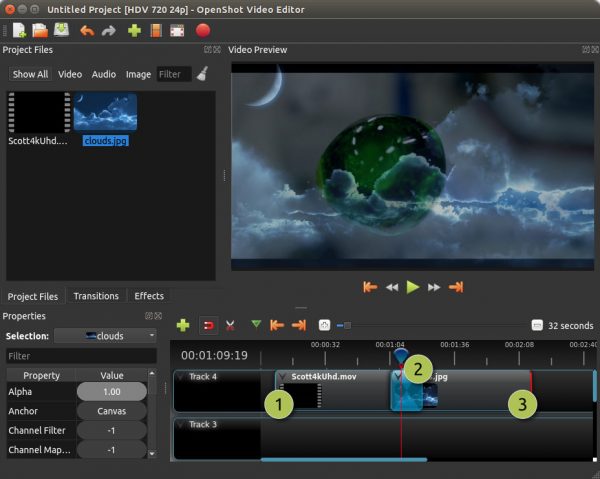
If you’re looking for the closest Windows Movie Maker alternative, no software can be better than OpenShot, especially the workflow and layout. OpenShot is a cross-platform movie maker with support for Linux, Mac, and Windows. It allows you to easily add subtitles, transitions, and effects to your videos, then export your videos to many common formats that can be compatible with DVD, YouTube, VimeoThe interface is basic, common but has everything you need. On top of that, most of basic features like speed adjustment, rotation, resizing, and fading can be achieved by right-click on the video.

Pros:

  • You can also burn MP4 to DVD, upload it to YouTube or Vimeo
  • Unlimited tracks or layers
  • Real-time preview of video editing

Cons:

  • The app crashed sometimes
  • Some of the templates may seem a little outdated

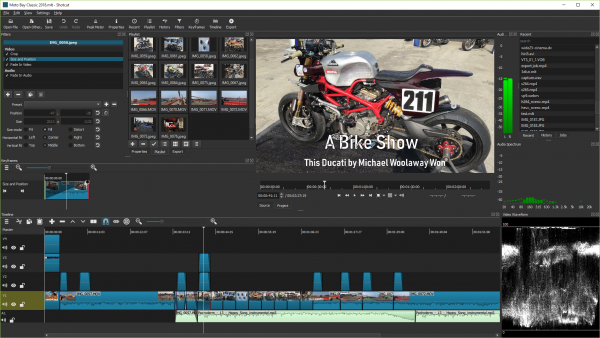
#2 Shotcut (Windows, Linux, Mac)

If you’re looking for a more complete Window Movie Maker alternative, try Shotcut, a free, open-source and cross-platform software which is stuffed with great features. Its massive video and audio filters makes video creation more interesting. In a word, it covers all the features of what Windows Movie Maker has. However, it frustrated most users when they cannot add transitions on the video.

Pros:

  • Impressive drag and drop feature
  • Support for 4K videos
  • Available on Windows and Mac along with Linux

Cons:

  • Not friendly to beginner due to its complexity of interface
  • Has no option to preview before applying a filter

3. Windows Movie Maker Alternative for Android

#1 Inshot (Free, Paid)

Inshot is an all-purpose Windows Movie Maker alternative for Android and also iOS. It is so wonderful to cut, trim and split a long video into short video clips. it has a blur function, With the help of this feature, you can blur your video’s background. In addition, With InShot, you can add music, text to video. The Fast/Slow motion feature is fairly funny.

Features:

  1. Basic editing tools like: trim, cut, split, crop, rotate video, adjust speed
  2. Merge multiple clips into one
  3. Support adding music, sound effects and filters.
  4. All kinds of texts fonts, cute animated stickers and emoji
  5. Mix photos with Videos
  6. Share video to all social apps YouTube, Instagram, IGTV, Facebook, Whatsapp, Tik Tok, etc.

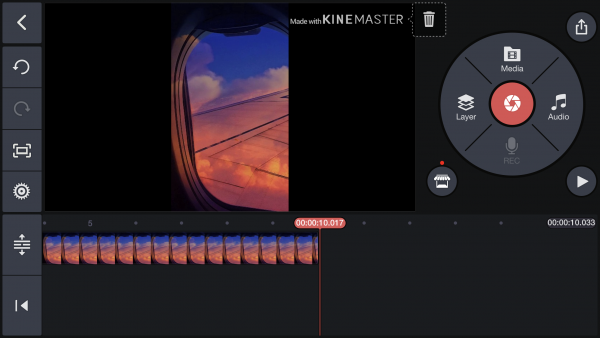
#2 KineMaster (Free, Paid)

KineMaster is a fully-featured and professional Windows Movie Maker alternative available for Android and iOS devices. It includes multiple layers of video, audio, images and effects. What’s more, users can add voiceovers, background music, voice changers, and sound effects to the video. However, if you want to access more functions like removing the annoying watermark, you need to make a subscription for $4.99 per month. Although it is not powerful as desktop Windows Movie Maker alternative, it’s still worth a try.

Features:

  1. Editing tools to trim, splice, and crop your video
  2. Export 4K video
  3. Reverse video
  4. Multiple layers of video, images, stickers, special effects, text, and even handwriting
  5. Keyframe animation tool

Part 3:
Comparison Chart

Products Free/Paid Supported Output Formats Supported Platform
Wondershare Filmora9 Free/Paid MOV, MP4, M4V, MKV, AVI, F4V, TS, MPEG-2, WebM, M4A, MP3, GIF Mac/Windows
Microsoft Photos Free Share to social media, email, or another app Windows 10
Videopad Video Editor Free for non-commercial use AVI, WMV, MPG, 3GP, MP4, MOV, MKV, GIF Mac/Windows
Avidemux Free AVI, FLV, MKV, MP4, MPG, MPEG, OGM, TS, VOB Mac/Windows/ Linux
Videolan Movie Creator Free Only supports file input Mac/Windows/ Linux
Openshot Free AVI, DVD, VCD/SVCD, MPEG, MP4, etc Mac/Windows/ Linux
Shotcut Paid Most of the popular video formats Mac/Windows/ Linux
 Inshot Free/Paid  MP4 iOS/Android
KineMaster Free/Paid  MP4  iOS/Android

Part 4: Do You Know Other Great Windows Movie Maker Alternatives?

As mentioned above, there are 9 favorite Windows Movie Maker alternatives. People will choose one for its use-friendly interface, more comprehensive functions or just for free. Any ideas to Windows Movie Maker alternative? We’d love to hear from you! Please feel free to share it in the comments below.

Related Post

By |2020-06-04T17:34:55+08:00June 4th, 2020|Tags: , , |

Beginners Guide: How to Make a Green Screen for Free

You must have heard that most movie clips are made with green screen, big-budget films like Hollywood blockbusters are no exception. But can you imagine the weather forecaster also uses a green screen to look like they really stand in front of a cool weather map?

In this article, we’re going to talk about the secret of green screen and give you some ideas on how to make a green screen and create a green screen video.

With that in mind, this blog will discuss:

All about Green Screen

In the competitive world of film industry, it is increasingly essential that video stands out from the crowd. A particular tool that directors always use to make their production to a higher level is green screen.

Before we learn how to make a green screen, let’s look what green screen is, why we use it and where to use it?

What is Green Screen

Green screen is also called Chroma Keying. It is a central part in film production process. It refers to replace the green background color with another image by using green screen effect. This technology is widely used in video production and film making.

Benefits of Making a Green Screen

Making a green screen is a smart choice for filmmakers for the following reasons:

  • Cost and time saving. If you have learned how make a green screen, you don’t need to pay for other expenses like venues, equipment and other resources. Because green screen can provide you with one place but infinite possibilities, wherever you want.
  • Security. Sometimes actors have to do some dangerous acts, it can protect them from it by making a green screen.
  • Controllability. Make a green screen can ensure the film will not be delayed for some uncontrollable factors like weather, external environment etc.
  • Professionalism. Make a green screen will make your creation looks like more professional, which differs from others.

 Use cases

  • Film production
  • Post-production
  • Newscasting
  • Weather reports
  • Video game industry
  • Anyone who wants to make a green screen in order to make their photos or videos look more appealing

4 Ways to Make a Green Screen

Green screen is not only used in movie production but our daily lives. Everyone can add a green screen effect on their photos or movies. Green screen software makes it possible. Now we are going to share with you 4 ways to get how to make a green screen video.

Filmora

Filmora, or Wondershare Filmora is a popular green screen software designed for both Windows and Mac. Basically, it is a video editor that can be used to create and edit a video. With the Green screen feature support, how to make a green screen is a breeze. It comes with 40+ green screen effects that you can use.

Apart from the green screen effect, it allows you to cut, crop, split, add titles, apply music etc on your videos. It also offers a number of Input and Output formats like videos, audios, images and MP4, MOV, AVI, GIF etc.

How to Make a Green Screen with Filmora?

1. Download and install Filmora on your device

Download Filmora on your desktop, install and open it

Free Download Windows Filmora
 
Free Download Mac Filmora

2.Import your video and green screen footage into the program

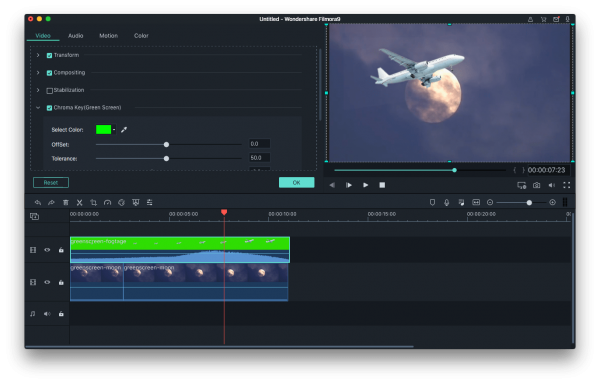
Make sure that the Green Screen footage places above the video clip. Double click the green screen footage or right-click on the green screen material and select Green Screen to edit.

3. Tweak the green screen settings

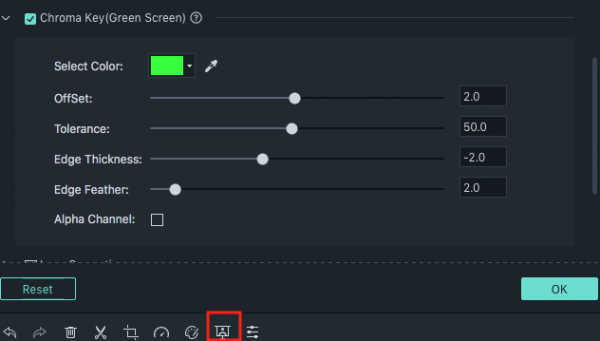
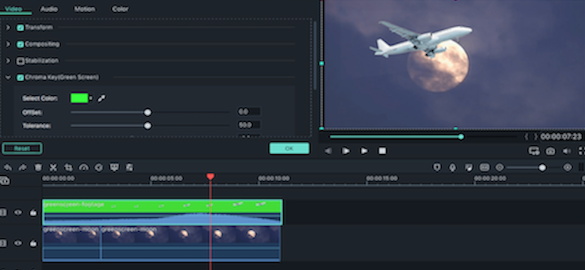
Scroll down and choose Chroma Key (Green Screen), then select the green screen color. There are other options like Tolerance-adjust clarity of your background, Edge thickness- fix the edges of the subject. You can adjust them according to your needs. After all these done, Click “OK”. Then you will see the two videos will appear as one.

4. Export the video

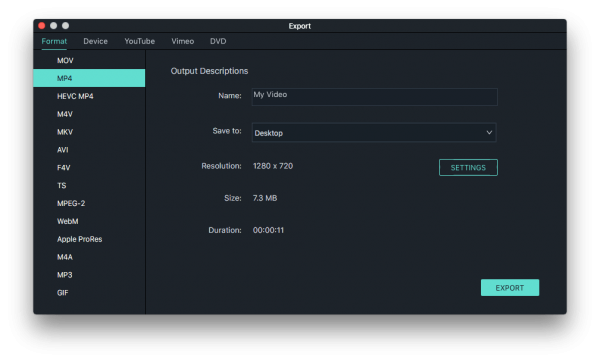
Click Export button and choose output format, save and share it to YouTube or Facebook.

iMovie

One of the best choice of green screen software for Mac and iOS should be iMovie. Almost every mac owner uses it to edit videos. Apart from the very basic video editing features such as cutting, trimming, splitting etc, what impresses us most is its multicolor effect. You can use both green screen or blue screen. What’s more, it’s really friendly for beginners with a simple and easy-to-use interface.

How to Make a Green Screen on iMovie?

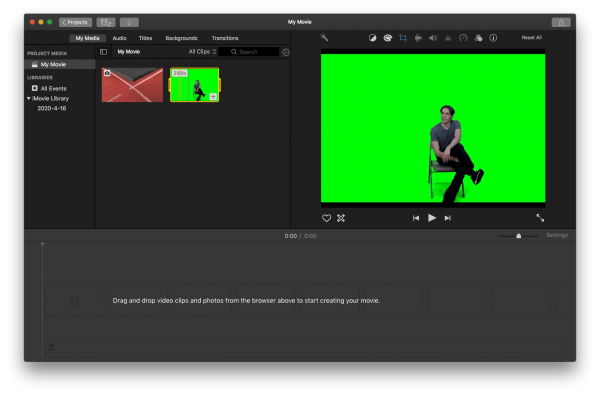
1.Import an image or video background and a green screen footage

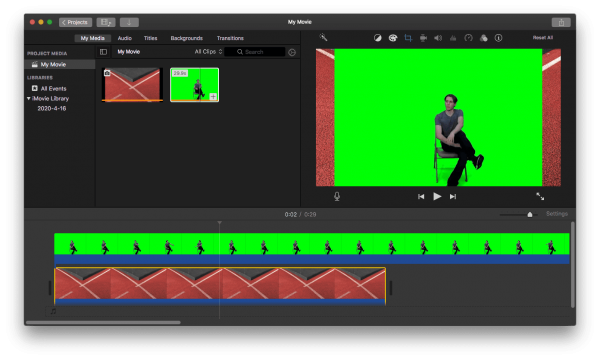
2. Drag and drop the background video or image into the timeline

Make sure the green screen footage above the background.                                                                                                                                 3. Adjust the length and make they match together
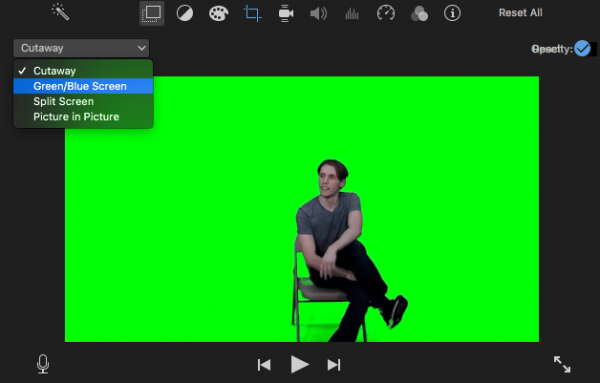
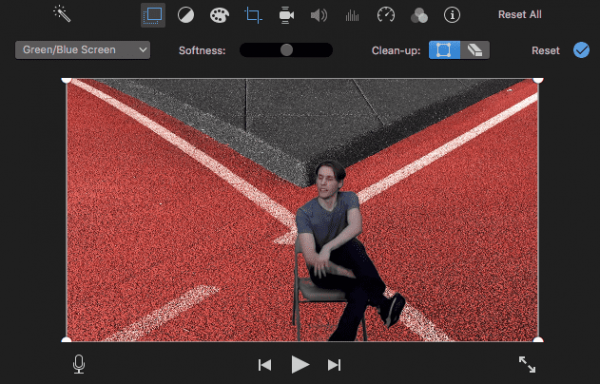
4. Double click the green screen background in the timeline, then go to the top menu, choose Cutaway > Green/Blue Screen

5.Now you will see that the green screen background has been removed

Zoom

Zoom is known as a popular video conferencing service. It has a built-in green screen effect which allows you to use an image or video as the background. So, it’s can be special if you have a meeting or do some presentations in front of a cool image or video. In addition, the green screen effect plays a great role in hiding your messy room.

How to Make a Green Screen on Zoom?    

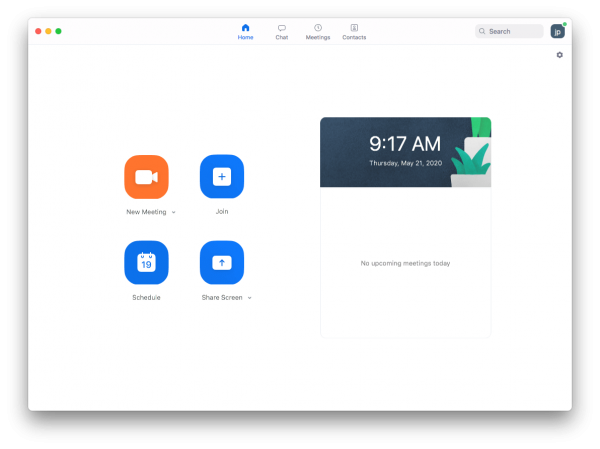
  1. Download and launch it
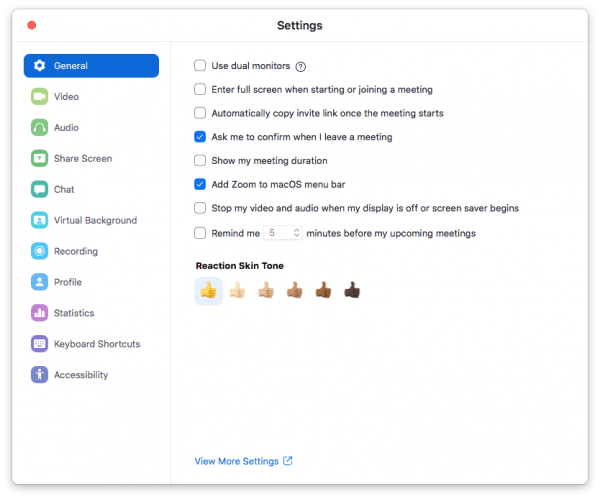
  2. Open Zoom and Click Setup icon in the upper-right corner
  3. Choose Virtual Background in the left-hand menu

It has provided some sample backgrounds for you You can choose one to use or add other images you like                                                                                                                                            

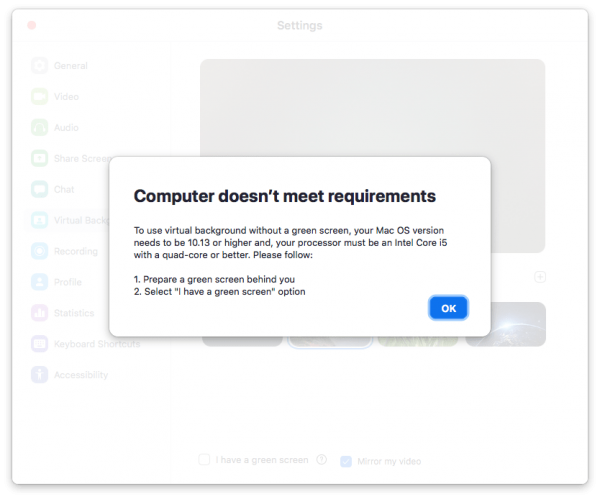
However, there are some requirements if you want to use this function. A higher end Mac OS version with an Intel Core i5 processor. So, if you have a lower-end system, you may be able to use this feature, but you’ll need to make a physical green screen behind you.

TikTok

Tiktok is a global short-video platform, inspiring people’s creativity and bringing them joy. It offers a large range of interesting effects for users. One excellent effect is the Green Screen Video effect-a new version of green screen effect. It has been applied in making a green screen video with more than 50 million creations. With this green screen effect, users have the ability to go anywhere they want to in the virtual background.

How to Make a Green Screen Video TikTok?

  1. Open the app and tap on the “+” to create a video
  2. Select “Effects” > “Trending”, then look for the green screen video icon
  3. Choose a video from your phone’s library to use it as a background and start to record

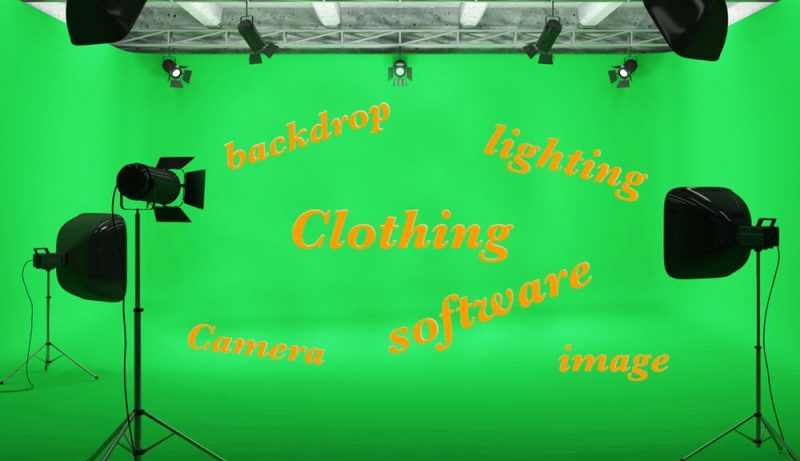
Fashionable Green Screen Kits

What material is best for making a green screen?

1.Backdrop

To begin, you will need a green screen background. You can purchase a collapsible green screen on Amazon. (Make sure the backdrop is well-pressed without any wrinkles.)

2.Lighting

Next, choose a steady and soft light. This one is important. If the light is unstable, shadows will appear on the green screen and thus making the process more difficult. (Be sure there are three lights)

3.Camera

Then you should to pick a camera or webcam that can shoot HD quality video (720p or higher). And make sure your camera is compatible with the format your green screen software can import.

No matter what camera you choose, Filmora makes it easy to make a green screen and make your edits.

4.Clothing

Clothing color can decide on whether it is a good green screen scene-so ensure that actors’ costumes do not be the same color as the green screen.

5.Images

After all these prepared, you should get a clear image to replace the green screen background. You can use photos and videos shot by yourself, a screenshot from a famous movie or download from some websites like Pexels and Pixabay.

6.Software

Last but not the least, a reliable green screen software should be considered carefully (VSDC Free Video Editor for Windows. iMovie for Mac, Filmora is the best choice for both Mac and Windows).

Tips for Making a DIY Green Screen at Home

if you want to make a green screen at home, you should consider several tips below.

  1. Choose a suit of even lighting and make sure the consistency of brightness in the process.
  2. Keep a proper camera distance.
  3. Buy an easy-to-hang up and move around green screen backdrop. Or you can use paper backdrop with a stand instead to be free from wrinkles.
  4. Camera works better than mobile Phone.
  5. Place lights 3+ feet away from the wall to avoid reflection.
  6. You can’t have any subject in front which is the same color as the green screen.

Make a Green Screen is Easy

Make a green screen video may seem complicated and difficult. But with the help of some green screen software, anyone can get how to make a green screen smoothly, especially for the beginners. So, go ahead and make a green screen video.

Related Post

By |2020-05-22T15:49:05+08:00May 22nd, 2020|Tags: , |

14 Best Video to GIF Software in 2020 (with High Quality)

In recent years, GIF, as the favorite way to express emotion for the young people, is gaining more popularity. When they chat with friends or coworkers online, they always use some GIFs. However, have you ever made a GIF by yourself? How to get it? We can convert Video to GIF with some free Video to GIF software.

There are lots of Video to GIF software portable on the Internet. Here, we will show you the most favorable Video to GIF software and other 13 picks of Video to GIF app.

Here’s a quick look at our picks (we’ll go into more detail below):

Part 1: Video VS GIF

Video is a MP4 format and contains audio, whereas GIF is a soundless animated image compressed into frames that loop around, which gives people “repeated” visual effect.

Example of a Video:

Example of a GIF:

Now let’s have a look at the pros and cons of Video and GIF

Video

Pros:

  • Memorable and visually attractive
  • Emotional
  • Can improve a website’s conversion rate.

Cons:

  • Expensive
  • Time-consuming

GIF

Pros:

  • Cost-effective
  • Easy to consume
  • Easy to create
  • Small file size

Cons:

  • Don’t support audio
  • Limited color pattern

In the changing internet world, GIF caters to the contemporary young people’s preferences and needs. Thus, Video to GIF software becomes essential.

Part 2: Video to GIF Software for Mac and Windows—Your Best Friend to Make GIF from Video

Although there are a number of Video to GIF software on the market, which one is most suitable for you? Here, we will recommend you the best Video to GIF software-Filmora.

Filmora is a powerful Video to GIF software for PC/Mac. It has pretty much every tool you need to deal with videos such as turning a Video to GIF, adding music, effects and so on. It’s very friendly to novice. If you are looking for an all-purpose video editor, Filmora should be your best choice. But if you are just looking to find a Video to GIF software, Filmora can provide professional guidance and more functions than you need for you.

  • Basic edit tools: crop, split, rotate, trim, adjust speed
  • Come with other pro features like add titles, music, transitions, effects and elements
  • Enable users to share videos to YouTube and other social media platforms
  • Support any formats of video like MP4, MKV, WMV, and AVI etc
  • PC/Mac Cross-Compatibility
  • No restriction of file size
  • Beat detection
  • Professional 3D LUTs effect layer support
  • Fast processing
  • One-click color correction
  • Organize your clips better by linking clips together to move them as a unit
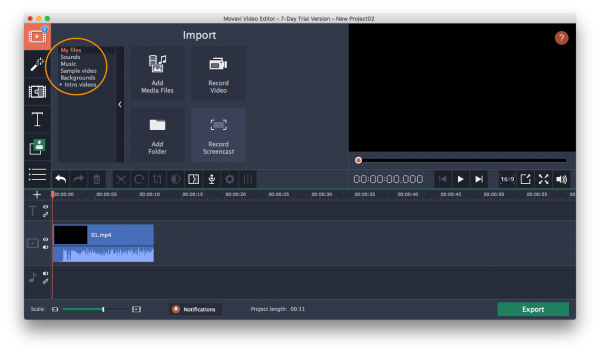
  • Up to 100 Video Tracks
  • Full 4K Support

Let’s see how to convert Video to GIF with Video to GIF software.

Step 1: Install the Video to GIF software on your PC/Mac

Download Filmora on your desktop, install and open it

Free Download Windows Filmora
 
Free Download Mac Filmora

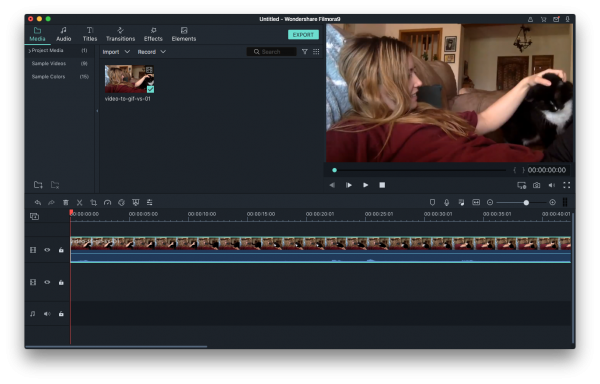
Step 2: Upload Videos

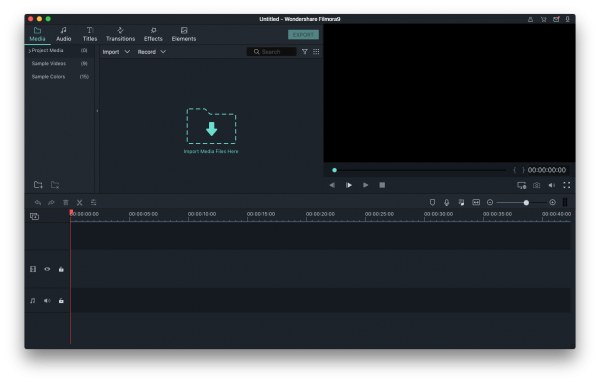
1. Choose “New Project” to create a new project

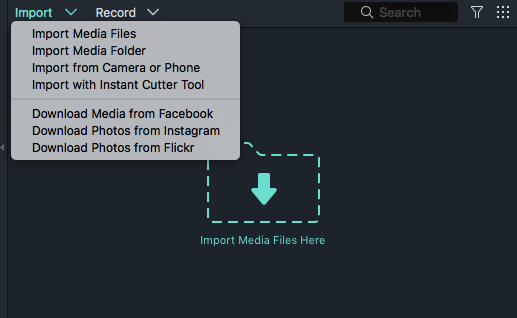
2.You can import files by clicking “Import Media Files Here”

Or clicking “Import

Or just drag and drop videos to the media library

Step 3: Edit the Video

Before the conversion, you can edit your video as your need, like crop, split, trim and etc.

Step 4: Export your Video

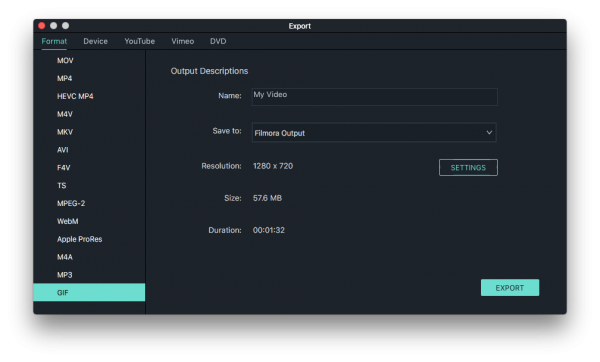
Once everything has been done, click “Export“, then choose GIF as your format.

Part 3: List of Video to GIF Software Alternatives for PC/Mac (Recommended)

  1. Any GIF Animator
  2. Cute Video to GIF Converter
  3. Free Video to GIF Converter
  4. Instagriffer
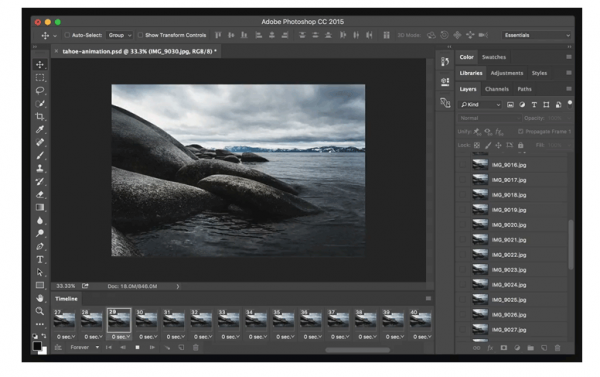
  5. Adobe Photoshop
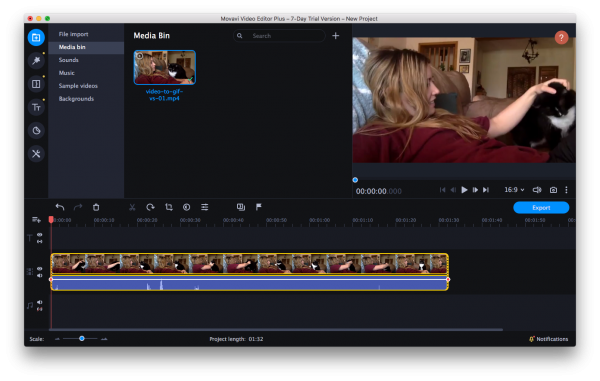
  6. Movavi
  7. MiniTool Movie Maker

Any GIF Animator

Price: Free

Available: Windows

Visit website: https://any-gif-animator.jaleco.com/

Any GIF Animator is a simple and easy to use Video to GIF software designed to help you convert your Video to GIF format. A feature we like most is that it allows to import files from any source: online website, DVD, a series of photos.

Pros:

  • Free
  • Effective and easy to use
  • Support any source

Cons:

  • Lack of an option to save your animation locally

Cute Video to GIF Converter

Price: Free

Available: Windows

Visit website: https://cute-video-to-gif-converter-free.soft112.com/

This is another free Video to GIF software which convert Video to Gif animation. It’s packed with an intuitive GUI including a single window that shows all options. It can convert almost all popular video formats to gif, like AVI, WMV, MPEG, MOV, FLV, MP4, 3GP, VOB, etc, along with several audio formats, like WMA, AC3 and MP3.

Pros:

  • Free
  • Fast conversion

Cons:

  • Slow execution
  • Don’t support batch conversion

Free Video to GIF Converter

Price: Free

Available: Windows

Visit website: https://free video to gif converter.en.softonic.com/

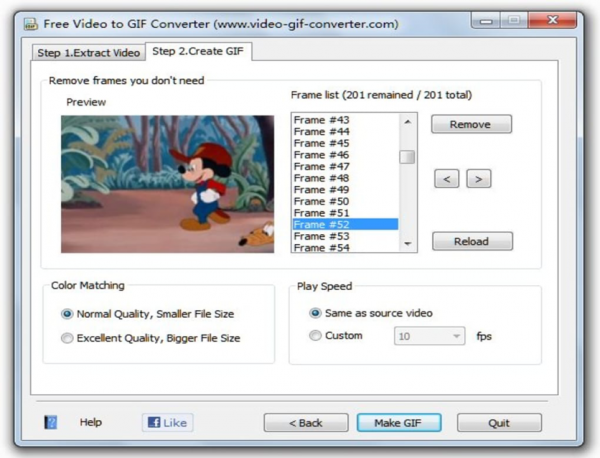
This tool is also very simple to use. It supports file types include GIF, AVI, MPEG, mp4 and wav among others. Users can chop and change frames, adjust width and height, pick playback speed, choose color matching and more.

Pros:

  • Free
  • Easy to operate

Cons:

  • Little extra functions
  • Some issues with newer systems
  • File size limitation (<10M)

Instagriffer

Price: Free

Available: Windows

Visit website: https://instagiffer.com/

Instagriffer is a powerful Video to GIF software with filters. It lets users to import GIF from local folder on the device or download video from YouTube by pasting a link. This app supports a wide range of video formats and a lot of advanced options, like smoothness (fps), frame size, quality, brightness, playback rate (slow/fast), caption and filters.

Pros:

  • Free of cost
  • No watermarks
  • No viruses, spyware or annoying ads

Cons:

  • Difficult to handle for beginners

Adobe Photoshop

Price: US$19.99/mo

Available: Windows/Mac

Visit website: https://www.adobe.com/uk/products/photoshop.html

Almost everybody know that Photoshop is a computer program that allows users to create and edit images interactively. However, do you know Photoshop can make a GIF as a Video to GIF software? If you want to make a GIF seriously, Photoshop is most people’s go-to option.

Pros:

  • Professional and Multifunctional

Cons:

  • Do not support a video that is too long
  • Easy to collapse

Movavi

Price: $49.95

Available: Windows/Mac

Visit website: https://www.movavi.com/mac.html

With its super-fast and reliable feature, Movavi is regarded as one of the most standard Video to GIF software. It can run on both Windows and Mac. The greatest feature is its batch conversion, which helps users save lots of time. In addition, it is a versatile Video to GIF software, with its help, you can create a GIF from any video file, you can also crop, rotate, reverse, change colors, apply filters and effects, add your own text and more.

Pros:

  • Batch conversion
  • Extremely fast conversion speed

Cons:

  • Not allowing users to download videos online

MiniTool Movie Maker

Price: Free

Available: Windows

Visit website: https://moviemaker.minitool.com/

If you do not need additional features and a basic Video to GIF software is all you want, MiniTool Movie Maker is well worth downloading on your Windows. It can help you make GIF from video as well as make a cool and interesting movie. Splitting, combining, cutting, adding filters, text and even applying music to GIFs are all allowed on this app.

Pros:

  • Totally free
  • No watermarks
  • Support various file formats

Cons:

  • Too large memory

Part4: A Few Free Video to GIF Software Online You Should Know

For convenience, most people tend to make GIFs online instead of downloading a Video to GIF software. If you are one of those people, I recommend you the following free Video to GIF converter online.

1. Ezgif.com

Ezgif.com is a simple online Video to GIF software for basic GIF editing. It allows you to upload your mp4, avi, WebM, flv, wmv and other popular types of video. Video can be uploaded from your computer or URL of other websites.
Steps to convert Video to GIF:

  1. Choose Video to GIF on the top menu
  2. Choose a file from your computer or paste video link.
  3. Hit Upload video
  4. Edit your Video, like crop, rotate, adjust speed, add subtitles and etc
  5. Click convert to GIF

What could be better: It takes a while for conversion.

2. MakeAGIF

With a beautiful interface, this Video to GIF software require users to create their own GIFs by logging in with an account. MakeAGIF enable users to make a GIF from multiple ways: pictures or videos from your computer, videos from a YouTube URL, a Facebook URL, or video from your Webcam.

Quick steps to convert Video to GIF

Step 1: Log in

Step 2: Upload a Video or copy a URL from YouTube or Facebook

Step 3: Make your GIF settings: Quality (Low, Medium, High, HD), Time (start and end), Length, Speed. Also, you will be required to select a GIF category on the left bar.

Step 4: Click CONTINUE TO PUBLISHING>CREATE YOUR GIF

What could be better: The GIF will end up watermarked.

3. Giphy

You must have heard and seen this Video to GIF software for its popularity. There is also a mobile version for those who don’t use computer very often. Besides the video file chosen from your device. It supports URLs from YouTube, Vimeo, and GIPHY links.

How to make a GIF from Video with Giphy?

Step 1: Choose a Video from your computer or add URL from YouTube, Vimeo or GIPHY

Step 2: Edit Video.

Select the Start Time and Duration and you can add caption, stickers, apply filters to it.

Step 3: Download GIF

Click Upload to GIPHY to convert your video to GIF.

What could be better: This online website does not support URL paste.

4. Gifmaker.me

An easy to use Video to GIF software, Gifmaker.me can not only create GIF animation but also combine animated GIFs. If you’re looking for a very simple and very basic Video to GIF software, this tool is good for you. The only weak point here is it doesn’t support URL paste from other resources.

How to convert Video to GIF:

  1. Choose Video to GIF
  2. Set the start time and end time, adjust the width and height
  3. Tap on “Convert Now” button to convert your Video to GIF format.

What could be better: This online website does not support URL paste.

Part 5: Simple Tips & Tricks to Turn YouTube Video into GIF

We always have fun when watching some interesting YouTube videos online. But when it comes to turning YouTube into GIF, “YouTube to GIF” tools become invaluable. There are a lot of Video to GIF software can help you do this and most of them are web-based. That means you don’t need to download and install any Video to GIF app.

#1 Turn YouTube Video into GIF Using Freegifmaker

Here are simple steps to turn YouTube Video into GIF

  1. Open http://freegifmaker.me/youtube-to-gif/
  2. Paste the URL of Video
  3. Click “Load YouTube video”
  4. Set the Start time and Duration
  5. Hit the “Make a GIF button

Tips: Please keep patient for it will take a while to verify and upload.

#2 Turn YouTube Video into GIF Using Online UniConverter

How to turn YouTube into GIF?

  1. Open the https://www.media.io/gif-maker.html
  2. Copy and paste a Video URL
  3. Trim your video by setting the start and end time
  4. Click CREATE GIF

Tips: You have to log in when using this Video to GIF software

Part 6: Video to GIF Maker FAQ

Are there any Video to GIF software on iPhone?

  1. ImgPlay
  2. Video to GIF-GIF Maker
  3. Live Photos
  4. Giphy

Is Filmora Free?

The full version of Filmora Video to GIF software is not free, but there is a free plan for you.

How do you turn a Video into GIF?

  1. Open Filmora
  2. Import your Video file
  3. Edit the Video like crop, rotate, add titles, apply music and etc.
  4. Click Export and choose GIF as the output format.

Related Post

By |2020-08-28T15:57:31+08:00May 9th, 2020|Tags: , , |

8 Best Video Cropping Software for 2020 (Free, No Watermark)

Before uploading a personal video to YouTube or other social platforms, we want to crop it to make sure there are no unwanted parts appear and we want it professional looking. For this, today we will focus on video cropping, listing you 8 best video cropping software to customize your videos, there are high quality tools, also best free video cropping software with no watermark added.

Best Video Cropping Software for 2020

Filmora, with its growing fame in the field of multimedia kits, has become one of the hottest video editing software in 2020. Being a powerful and all-rounded video editor, it surely includes the feature to crop various formats of videos, and in a professional way. It is both available on macOS and Windows. Now, let’s dive in to find out why Filmora ranks top on a list of best video cropping software.

Main Features of Filmora

  • Basic editing tools: rotate, merge, trim, split, crop, flip and stabilize videos;
  • Drag and drop workflow for easy editing;
  • Add preset motions to customize your image or video;
  • Add music and sound effects;
  • Build in video effects;
  • Add titles;
  • Download media online;
  • Burn video to DVD;
  • Export video to different formats;
  • Upload video to YouTube or others;
  • Record video;

How to Use The Best Video Cropping Software?

  1. Download and install Filmora to your Mac or Windows PC;
    Free Download Windows Filmora
     
    Free Download Mac Filmora
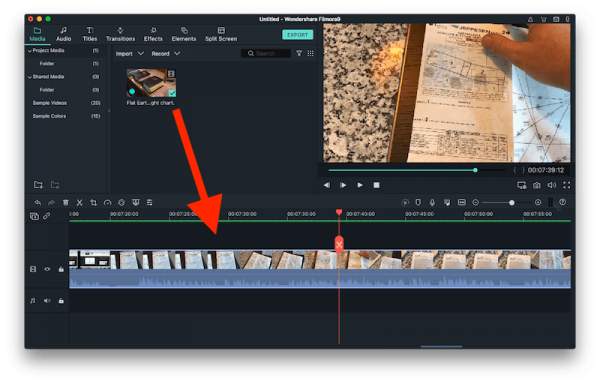
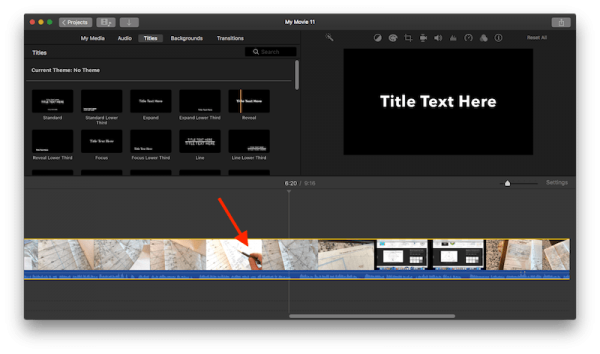
  2. Drag and drop your video for import, then drag to the Timeline;best video cropping 01
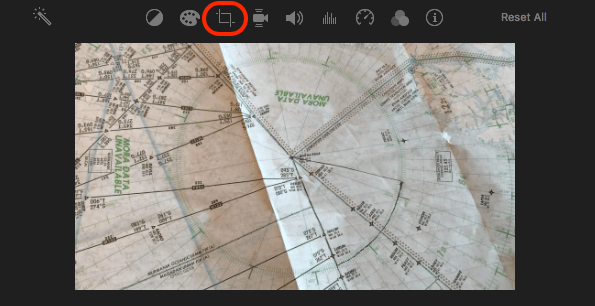
  3. Find the Crop tool as following;best video cropping 02
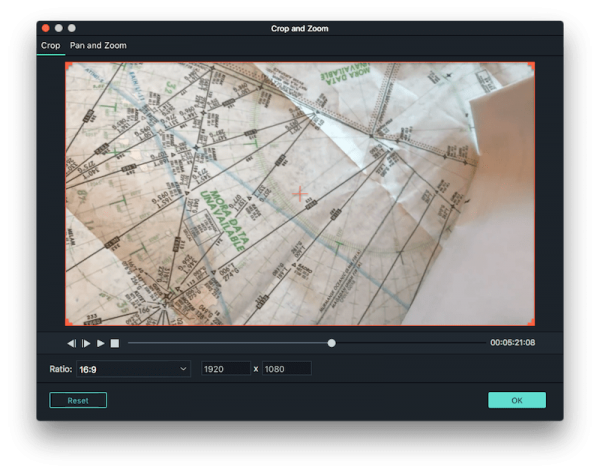
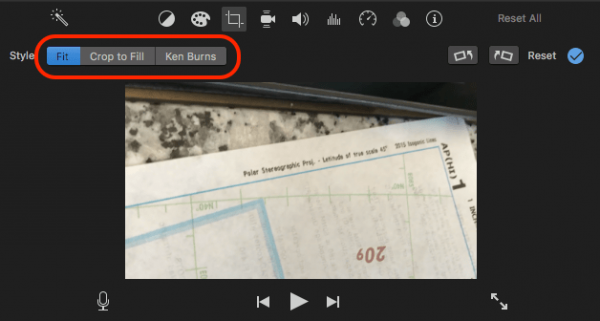
  4. Then adjust the settings in the Crop Window and crop as needed;best video cropping 03
  5. Lastly, go to File>Save to store the cropped video on your Mac or Windows PC.

Runner-up: Movavi Video Editor

If you want more options besides Filmora, Movavi Video Editor is a runner-up. In fact, most of the video cropping software share the same features, what differentiate from each other is its library to offer cool and innovative elements to decorate your videos, obviously, Movavi Video Editor is doing good on this point. Also, it is available on macOS and Windows.

Main Features of Movavi Video Editor

  • Basic editing tools: rotate, trim, crop, pan& zoom, etc.;
  • Add filters/transitions/titles/stickers/callout
  • Stabilize videos;
  • Record video;
  • Record and edit audio;
  • Export video to differ video or audio formats;
  • Upload videos to YouTube or other platforms;
  • Auto-create videos with ready-made templates or media files;
  • Record video;

How to Use Movavi Cropping Software?

  1. Download and install Movavi Cropping Software to your mac or windows;
    Free Download Movavi for Windows
     
    Free Download Movavi for Mac
  2. Import your video to the program, then drag and drop to the Timeline for editing; best video cropping software movavi
  3. Then click on the Crop button, crop your video as needed;movavi cropping software
  4. Once ready, click Export to Save as or directly save the cropped video;

Best Free Video Cropping Software for Mac (No Watermark)

Paid video cropping software makes a video editing job easy and closely to perfect with its rich features. But if you want a free video cropping software that can do the job without adding a watermark, there are options.

For mac users, the best free video cropping software is macOS bundled iMovie, before switching to Filmora, I am a 3-year user of iMovie, it is free and can basically meet all my video editing needs back then.

iMovie also offers a list of features:

  • Basic editing tools: adjust color, trim, enhance, crop, split, stabilize, etc.;
  • Add filter, effect, background, transition, title, audio, etc,;
  • Share to YouTube or other platforms;
  • Offer different themes of templates;

How to Crop Videos on Mac Free without Watermark?

  1. Run iMovie;
  2. Drag and drop video to Timeline;mac cropping video software01
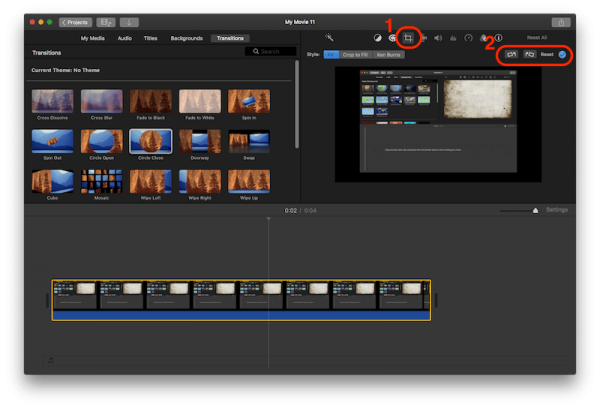
  3. Click on the Crop button here;mac cropping video software02
  4. Then choose a cropping option;mac cropping video software
  5. Once ready, go to File>Share>File.

Best Free Video Cropping Software for Windows (No Watermark)

I understand that many users pick Windows Movie Maker as the best free Windows video cropping software with no watermark, however, we have to realize the fact that Window Movie Maker is not available in Windows latest version, that means many Windows users are not allowed to utilize this tool. Therefore, here we give another option—Free Crop Video.

It is a one-feature Windows program designed to crop videos only, it is 100% free and offline, lightweight and easy to use.

How to Crop Videos on Windows without Watermark?

  1. Download and install Free Crop Video;
  2. Click “+” button to import video for cropping;windows video cropping software
  3. Adjust the cropping settings, once ready, click OK to save the cropped video onto your windows pc.windows video cropping software02

Best Online Free Video Cropping Software

For users who seek solutions to crop videos online free, here are 4 options. Each has its disadvantages or advantages, you can refer to the details as following.

#1 EZGIF Video Cropping (No Watermark)

EZGIF ranks top in the online free video editing services, it is mainly designed to edit animated Gifs, but it does more. It enables users to make and convert Gifs, also allows users to edit their videos easily, including but not limited to rotate, resize, reverse, cut, crop, mute, add subtitles.

Cons:

  • Max file size: 100MB;
  • Take time to upload and crop videos online;
  • Video quality is lost in the output file;

Steps to Crop Videos Online Free with EZGIF

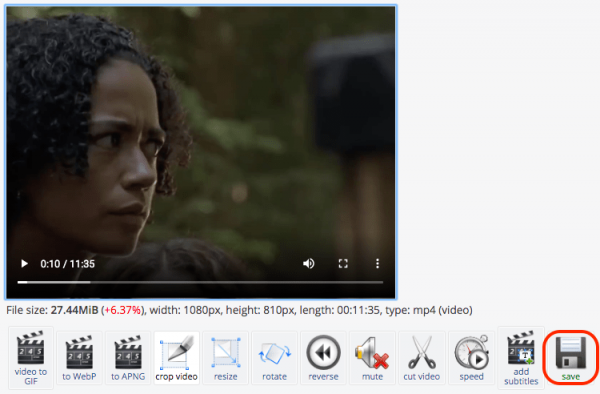
  1. Go to EZGIF.com, choose Crop Video;ezgif crop video 01
  2. Upload your video to EZGIF;
  3. Then adjust the cropping settings and click Crop video;ezgif crop video 02
  4. Save the cropped video to your mac or windows pc.ezgif crop video 03

#2 Online Video Cutter (No Watermark)

It is extremely easy to crop videos on this platform, you are allowed to crop videos from local folder, Dropbox, Google Drive, even via URL. It provides options to crop with aspect ratio or customize yourself. Also, it allows you to choose different video quality.

Cons:

  • Take time to upload and crop videos;
  • Large size of cropped video output;
  • Sacrifice original video quality;

Steps to Crop Video Online Free with Online Video Cutter

  1. Go to Online Video Cutter;
  2. Drag and drop video;
  3. Click on Crop button and choose cropping settings;
  4. Then save the cropped video to your device.online video cutter

#3 Kapwing Video Cropping (No Watermark)

Kapwing is an online video editor with user-friendly interface, it offers rich features to decorate your videos. On cropping, one thing separate it from other online video cropping services is that it helps users to choose the suitable cropping option, basing on their need, to upload to YouTube, Instagram or others. Yet, it requires a sign-in with Google or Facebook to download the cropped video.

Cons:

  • Take time to upload and crop video;
  • Require sign-in to download cropped video;
  • Large size of cropped video output;

Steps to Crop Video Online Free with Kapwing

  1. Go to Kapwing editor;
  2. Drag and drop the video to the program;
  3. Click Crop and choose a cropping option;kapwing video cropping
  4. Click Done Cropping;
  5. Sign in to download the cropped video;

#4 Media Video Cropping

The last one on the online free video cropping list is Media Crop Video. The reason why I put this at the end of the list is for its slow cropping, it takes quite a long time to process the cropping, but at least, it does helps on video cropping.

Cons:

  • Very slow to upload and crop video;
  • Video quality is lost in the cropped video output;

Steps to Crop Video Online Free with Media

  1. Go to Media Crop Video;
  2. Drag and drop video for cropping, choose a cropping option;media crop video
  3. Then click “Start” to crop your video;
  4. Download the cropped video to your computer;

Conclusion

As you can see, the online free video cropping tools all take a relatively long time to crop videos, also, there are all kinds of limitations, like file size, video length, sign-in registration. And that’s the reason why so many users finally pick a paid and professional video cropping software to do the job, in addition, such a professional video tool enables users to do more, making your videos as beautiful as you can imagine.

Related Post

By |2021-03-16T09:51:16+08:00April 29th, 2020|Tags: |

6 Ways to Remove Background Noise from Video (Mac, Windows, Online, Phone)

A video mixed with background noise will greatly sacrifice the video quality. However, it is inevitable, because a perfect place cannot be always guaranteed when you need to shoot videos. Then, how to remove background noise from video on Mac, Windows PC, on iPhone or Android phone, or is there any way to remove background noise from video online free?

The answer is YES. But, just as we need a video player to watch videos, we also need a video tool help on this, there is no shortcut, while the choice on such a video tool will depend on which device you are using. Here we offer 6 ways/applications to remove background noise from video, no matter you need to do this on a Mac, Windows PC, Online or mobile phones.

  • #1 Best Way to Remove Background Noise from Video (Mac & Windows)
  • #2 Remove Background Noise from Video Mac iMovie
  • #3 Remove Background Noise from Video Online
  • #4 If You Have Installed Adobe Premiere
  • #5 Remove Background Noise from Video Android
  • #6 Remove Background Noise from Video iPhone

#1 Best Way to Remove Background Noise from Video (Mac & Windows)

It is true that there are so many options to remove background noise from a video. However, if you want to make this simple while retain original video quality, a professional video editor will be the best choice, like Filmora.

Filmora, its current version is 9, also called as Filmora 9 is a powerful video editing software, allowing users to trim, rotate, crop, add background/watermark/subtitle/effects/templates, tune, adjust video and audio or others in an easy way.

Main Features of Filmora

  • Basic editing: trim, split, rotate, crop, join, adjust, mute, detach, add texts/image;
  • Add effects: filters and overlays, elements/transitions/sound;
  • Advanced editing: pan & zoom, stabilize video, reverse video, record screen, tune color, PTP, create green screen, split screen, detect scene, offer power tools;
  • Action cam editing: instant cutter, edit action cam videos;
  • Export and share videos;
  • Remover watermark;
  • Support editing video, audio and image;
  • Available for macOS and Windows;

Steps to Remove Background Noise from Video in Filmora

  1. Download and install Filmora on your Mac or Windows PC;
    Free Download Windows Filmora
     
    Free Download Mac Filmora
  2. Then drag and drop the video to Filmora Timeline as following;filmora remove background noise from video 01
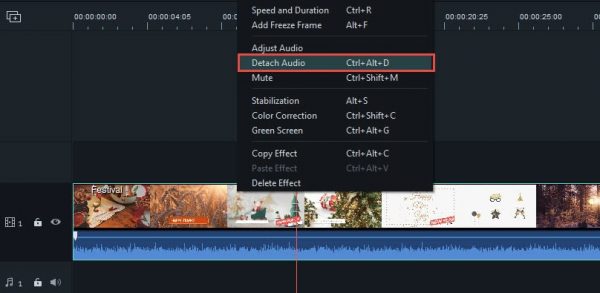
  3. Go to Detach Audio;filmora remove background noise from video 02
  4. Double click on the audio track, go to “Remove background noise”;filmora remove background noise from video 03
  5. (Optional) Edit the video as needed, then preview;
  6. Go to Export to save the video with background noise removed.

#2 Remove Background Noise from Video Mac iMovie

Speaking of editing videos on Mac, you cannot miss iMovie. iMovie is a free Mac video editing software to edit and customize videos, it offers virtually all basic editing features. But for more advanced or effects/templates, you may need to a professional tool, like Filmora.

Steps to Remove Background Noise from Video Mac iMovie

  1. Go to Finder>Applications, launch iMovie;
  2. Then drag and drop the video to iMovie Timeline; remove background noise from video imovie
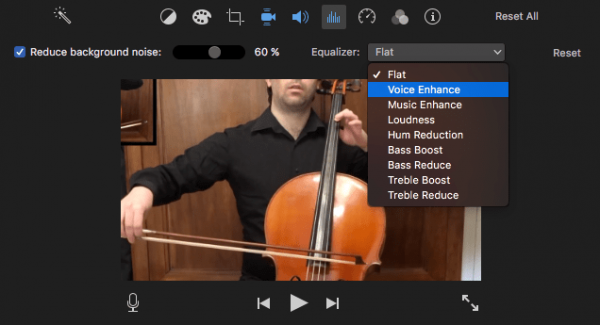
  3. Click on the “Noise reduction and equalizer” icon; Check before “Reduce background noise” and “adjust the amount of background noise reduction” according to your need. Also, you can utilize the Equalizer to enhance video voice or others.remove background noise from video imovie02
  4. Then go to File>Share>File, to save the video with background noise reduced;

#3 Remove Background Noise from Video Online

Well, as you can imagine, the tools to remove background noise from video online free is quite small in quantity, since it is not easy to edit videos online. However, if you want to remove background noise from video online free, there is one way out.

I have tried 5 online tools to remove the background noise from a video, 4 of them failed right from the first step, you have no way to upload the video successfully for background noise removal. The only one that can processed the video successfully, is Kapwing, even this online free program cannot directly remove the background noise directly, it can only mute the audio, you will need to add another background audio to this video. However, if this is acceptable, you can utilize Kapwing to remove background noise from video online free.

Steps to Remove Background Noise from Video Online

  1. Go to Kapwing;
  2. Click “Upload” to add your video for background noise removal;remove video background noise online01
  3. Once imported, click “Create!” to start muting your video;
  4. Then click “Download” to save the video after background noise removal;remove video background noise online02
  5. (Optional) Add background audio to your video with another online free “Add audio to video” program or offline video editing program.

#4 If You Have Installed Adobe Premiere Pro

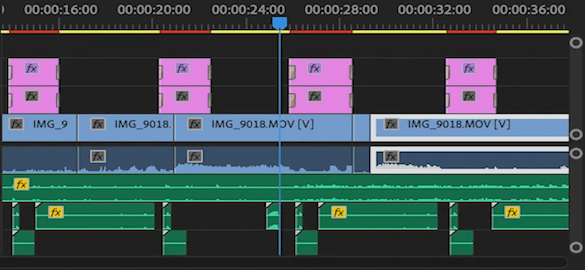
In the case that you have installed Adobe Premiere on your Mac or Windows PC, you can definitely remove the background noise from video in Adobe Premiere.

Steps to Remove Background Noise from Video in Adobe Premiere Pro

  1. Run Adobe Premiere Pro;
  2. Drag and drop the video to Adobe Premiere Timeline and select the clips you want to remove background noise;remove background noise adobe01
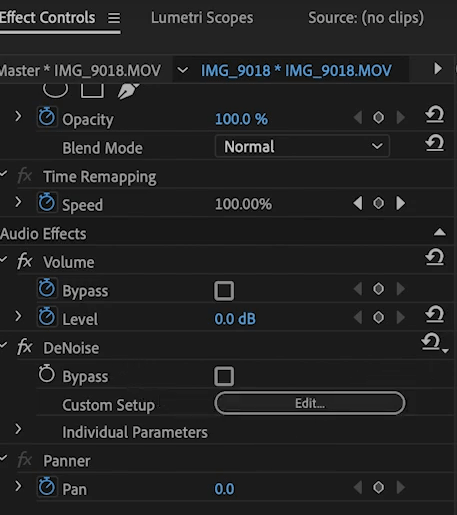
  3. Then go to Effects panel, input DeNoise, drag and drop the DeNoise effects to selected clips;remove background noise adobe02
  4. Then click on the Edit button on Effects Controls menu;remove background noise adobe03
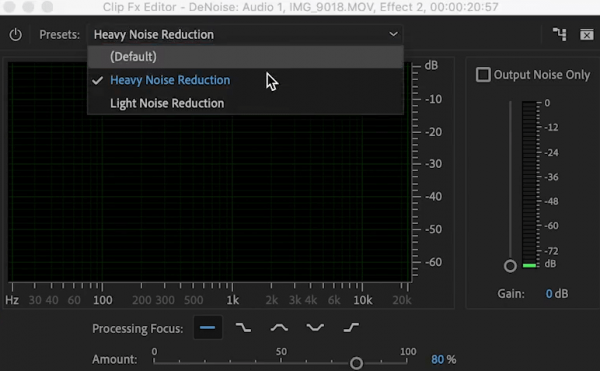
  5. You can choose Heavy Noise Reduction or Light Noise Reduction, or tweak other settings as needed;remove background noise adobe04
  6. Preview the video after removing background noise, then save the video.

#5 Remove Background Noise from Video Android

Nowadays, the user experience to shoot and watch videos on mobile phones is greatly enhanced, most of our users prefer to deal with videos on their Android phone or iPhone. In the case you want to remove background noise from video on Android phone, you will need an application to do this. BabbleLabs Clear Cloud is such a professional application to remove background noise, including traffic, sirens, wind, music, equipment, machinery, conversations, crying, dog barking, etc. It supports dealing with wav, mp3, m4a, aac, aiff, mp4 and mov files.

Steps to Remove Background Noise from Video on Android Phone

  1. Go to Google Play, download and install BabbleLabs Clear Cloud onto your Android phone;
  2. Find and select the video;
  3. Click the Edit button to remove background noise;
  4. Once ready, preview and save the video;remove background noise from video android

#6 Remove Background Noise from Video iPhone

While, the app we recommend to remove background noise from video on iPhone is AudioFix. It helps to automatically boost or clean audio in your videos, also it allows users to mute, resize even extract audios. There are 12 filer choices offered to remove background noise from video on iPhone.

Steps to Remove Background Noise from Video on iPhone

  1. Go to AppStore, download and install AudioFix;
  2. Find and select the video;
  3. Choose a filter that meets your needs to remove the background noise from your video;
  4. Apply the filter and start removing background noise on iPhone;
  5. Then save the video on your iPhone.remove background noise from video iphone

Conclusion

As you can see, no matter on which device you want to remove background noise from a video, you will need an application. There are quite few tools available to remove background noise from videos online free, you are always recommended to use a desktop one, it processes the background noise removal fast and offers a lot of editing features to customize your videos, just like Filmora.

Free Download Windows Filmora
 
Free Download Mac Filmora

Related Post

By |2019-12-26T10:35:36+08:00December 26th, 2019|Tags: |

8 Video Stabilization Tools to Stabilize Shaky Video Easily (2019-2020)

When recording videos or footages with camera, regardless of how scrupulous we are acting, any tiny movements of camera can still result in shaky videos. While, a video that shakes and wobbles won’t look professional and hence cannot meet the original expectation for a video sharing.

But never mind, here we will introduce top 8 video stabilization tools to stabilize your shaky videos easily, no matter you are a Mac or Windows PC user, no matter you want to stabilize videos online free or on your mobile device (iOS and Android).

Table of Contents

  • Method 1 Stabilize Videos in Premiere (Pro & CC)
  • Method 2 Stabilize Shaky Videos in Adobe After Effects
  • Method 3 iMovie—Mac Free Video Stabilization Tool
  • Method 4 Best and Most Affordable Video Stabilization Tool: Filmora
  • Method 5 How to Stabilize Videos Online Free?
  • Method 6 Stabilize Shaky Videos on Mobile Phone (iPhone & Android)

Method 1. Stabilize Videos in Premiere Pro

Speaking of editing and processing videos, Adobe Premiere Pro is always picked as the most professional program to do such a task. If you have installed Premiere Pro, you can stabilize your shaky videos, even beatify them in a creative way in Premiere Pro.

For the current version Adobe Premiere Pro CC, no matter you are using 2019, 2018 or 2017, the steps to stabilize videos are of no difference, you can refer to following steps to start video stabilization.

Steps to Stabilize Videos in Premiere Pro (Including CC 2019)

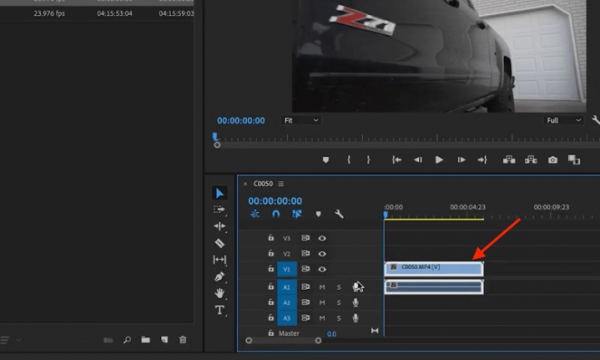
  1. Launch Adobe Premiere Pro CC;
  2. Drag your shaky videos into the Timeline;stabilize video in premiere 01
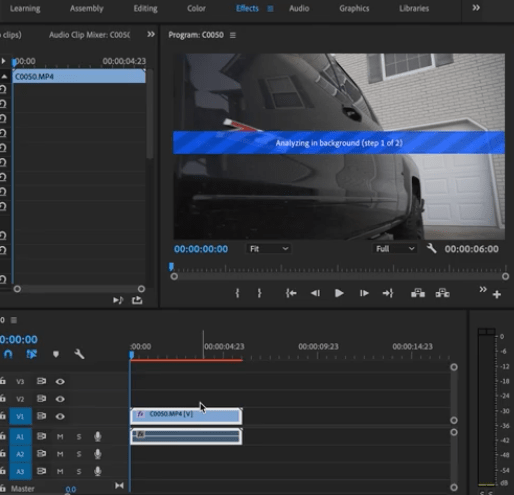
  3. Go to Effects Tab, then search Warp Stabilizer from the Effects menu;stabilize video premiere 02
  4. Then drag and drop “Warp Stabilizer” to the video you need to stabilize, then the analyzing will start;stabilize video in premiere 03
  5. Once ready, save the video or edit if needed.

Method 2. Stabilize Shaky Videos in Adobe After Effects

You may also have realized that Premiere Pro is not the only program from Adobe to edit and process videos, there is another option, Adobe After Effects. What’s more, the steps to stabilize video with Adobe After Effects Warp Stabilizer are virtually the same as that with Adobe Premiere Pro. Therefore, here we will introduce a different way to stabilize video without Warp Stabilizer in Adobe After Effects.

Steps to Stabilize Shaky Video in Adobe After Effects without Warp Stabilizer

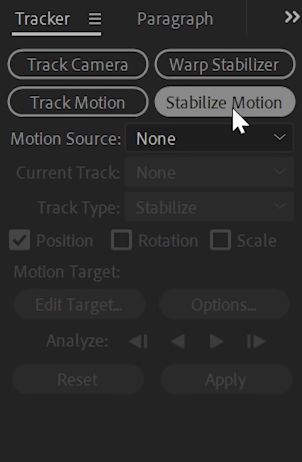
  • Step 1. Open the shaky video with Adobe After Effects;
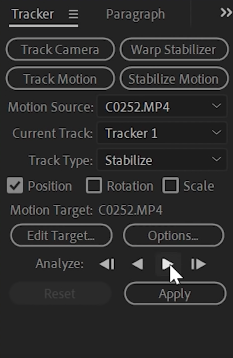
  • Step 2. Go to Tracker Windows, click on Stabilize Motion;  stabilize video after effects
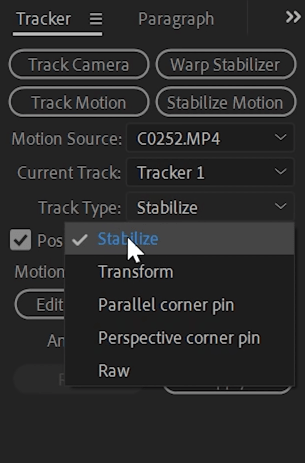
  • Step 3. Configure the settings (your motion source, current track and track type, check before Position only) as following;stabilize video after effects00
  • Step 4. Then set the tracking point, the small box defines the element we are going to track, the large box defines the area we are going to use to track. So, it will make sure the camera is sticking to the tracking point;stabilize video after effects01
  • Step 5. Then click the Analyze Forward button and Adobe After Effects will process stabilization by following the tracking point frame by frame;stabilize video after effects02
  • Step 6. Click “Apply” in the Tracker Windows, choose X and Y as Dimensions, continue with OK.stabilize video after effects03

Method 3. iMovie—Mac Free Video Stabilization Tool

If you are a mac user, it would be much easier to stabilize a shaky video, for the reason that all Mac users are allowed to use iMovie—free yet powerful video editing software.

Steps to Stabilize Shaky Video Free with Mac iMovie

  • Step 1. Go to Finder>Applications, launch iMovie;
  • Step 2. Drag and drop the shaky video to iMovie Timeline;

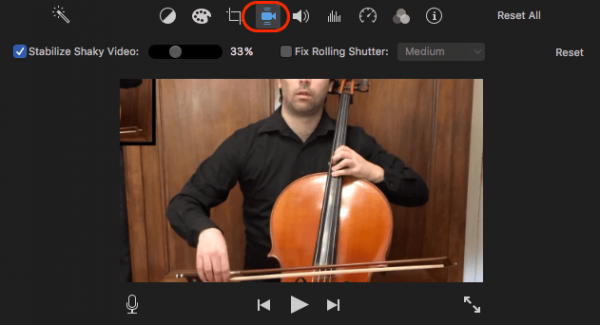
stabilize video imovie01

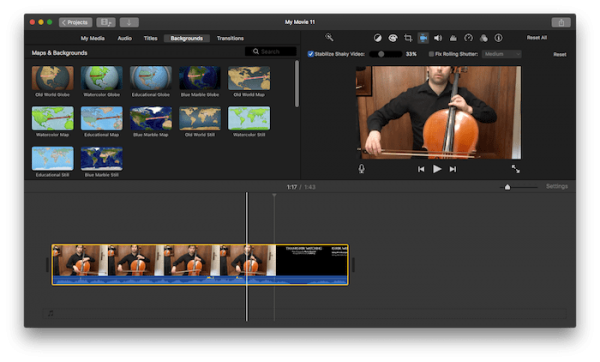
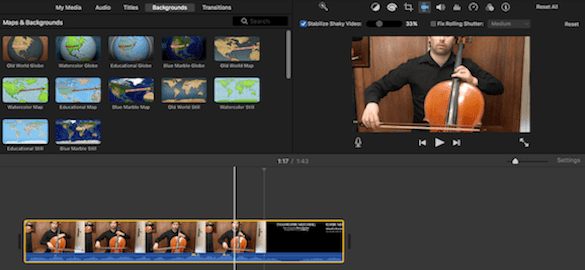
  • Step 3. Then click on the Stabilization icon, check before “Stabilize Shaky Video” to start the stabilization process;stabilize video imovie 02
  • Step 4. Once the stabilization finishes, go to File>Share, save or upload the stabilized video;

Method 4. Best and Most Affordable Video Stabilization Tool: Filmora9

It is true that Adobe and iMovie do a good job on video editing, but still a lot of users won’t pick them as the first options to stabilize a shaky video, for the reason that Adobe is too expensive while iMovie offers quite ordinary stabilization result. Maybe you need a professional but affordable program to deal with a shaky video, like Filmora9.

Filmora9 is a simple-to-use yet efficient video-editing program that has attracted global attentions in recent 2 years. It helps a lot to create both personal and professional videos, by providing basic editing tools like trim, rotate, crop, add watermark/background/subtitle, also allowing users to finish advanced editing tasks, like add dozens of media layers, add wonderful effects, customize videos with stylish templates, tune your media by fixing shaky videos, etc.

With a price $49.99, you can get the Filmora9 for 1 year, and the program is available on both macOS and Windows.

Steps to Stabilize Shaky Video with Filmora (Mac & Windows)

  1. Download and install Filmora9;
    Free Download Windows Filmora
     
    Free Download Mac Filmora
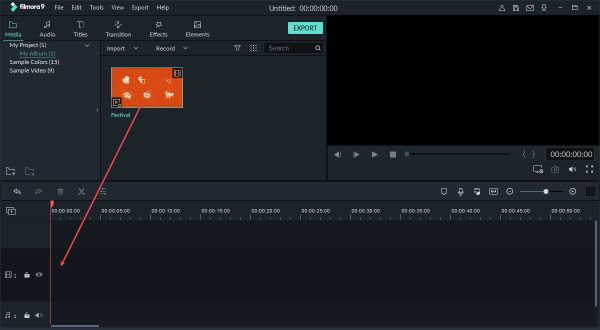
  2. Import the shaky video to Filmora Media Library by dragging and dropping;stabilize video filmora01
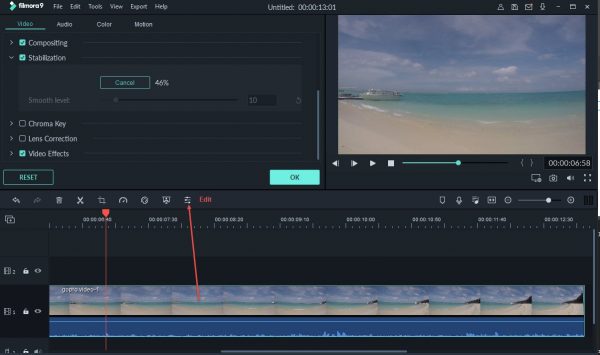
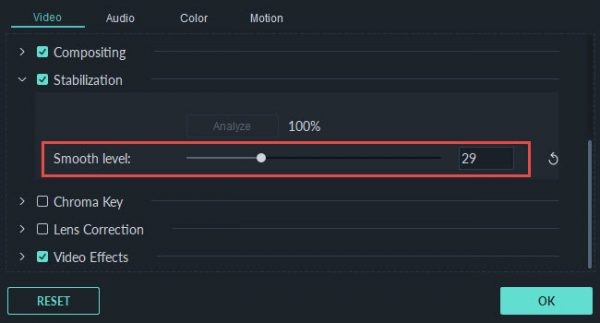
  3. Then drag and drop the imported shaky video to Timeline, double click on the shaky video to bring up the Edit pane, choose “Stabilization” to start stabilization process;stabilize video filmora 02
  4. Click on Play button to preview the video and configure the Stabilization settings if needed;stabilize video filmora 03
  5. Click OK to apply the changes and save the stabilized video.

Method 5. How to Stabilize Videos Online Free?

As long as there are online free video editors, you can find an online free video stabilizer to do the task. However, according to my tests on 8 tools, only 3 of them can stabilize the videos successfully, and here we list 2 of them, you can have a try.

Things You Need to Know about Online Free Video Stabilizer:

  • The stabilization process takes time, including the video uploading and downloading process;
  • Video uploading failure may occur, you need to repeat the process until the video is uploaded successfully;
  • Stabilization quality is not stable;
  • Require high on Internet connection;
  • Potential risk of information leakage;

#1. ezgif Video Stabilizer

ezgif is an online free video editor allowing users to convert, resize, crop, split, add effects, stabilize and so on. It is easy to use, and allows previewing before downloading the videos after process.

Steps to Stabilize Videos Online Free with ezgif

  1. Go to ezgif video stabilizer;
  2. Click “Choose File” to import shaky video, then click on “Upload video”;stabilize video online free 01
  3. After the stabilization, download the video.

#2 mp4compress Video Stabilizer

Another online free video stabilizer can stabilize shaky videos successfully online free is mp4compress, however it supports stabilizing MP4 videos only. Also, you are not allowed to preview the video after stabilization.

Steps to stabilize videos online free with mp4compress

  1. Go to mp4compress video stabilizer
  2. Click ‘Select File” to import shaky video, then click “Upload Video File”;stabilize video online free02
  3. After the stabilization, download the video.

Method 6. Stabilize Shaky Videos on Mobile Phone (iPhone & Android)

It’s much likely that you will shoot a video with the camera on your mobile phone, then how to stabilize shaky videos on iOS or Android phone? Here are the solutions.

Stabilize Shaky Videos on iPhone

The tool we use to stabilize shaky videos on iPhone is Emulsio by Creaceed, it is a professional iOS video stabilizer, offering different tools to stabilize the video to meet your requirements.

Steps to Stabilize Shaky Videos on iPhone

  1. Download and install Emulsio from AppStore;
  2. Run Emulsio and import the shaky video;
  3. Then adjust the Stabilization tool and check the result;stabilize video iphone
  4. Once OK, you can save or export the video

Stabilize Shaky Videos on Android Phone

While, the most popular video stabilizer for Android phone is Google Photos, an efficient application to back and share both videos and photos for free.

Steps to Stabilize Shaky Videos on Android Phone

  1. Go to Google Play, download and install Google Photos;
  2. Open the shaky video with Google Photos;
  3. Then tap on Edit button and choose Stabilise;stabilize video android
  4. Wait for the stabilization to finish, then save the video.

Conclusion

For different users, the method to stabilize a shaky video may be different, but the key is always to find a professional tool. Online free video stabilizer tools are worth a try, but the result may fall far short of your expectation. So, why not starting with a dedicated yet affordable video stabilizer?

Related Post

By |2019-12-05T11:13:45+08:00December 5th, 2019|Tags: |

How to Add Subtitles in iMovie on Mac, iPhone and iPad

This article will provide step-by-step instructions on how to add subtitles in iMovie along with some useful tips.

Developed by Apple, iMovie is a simple-to-use, versatile video editing software app available for macOS and iOS. It comes with an array of options and enables you to easily edit and manipulate your video clips. Can you add subtitles and captions to your videos in iMovie? The answer is yes. And this guide will show you how.


FAQ: Things to know about adding subtitles in iMovie

Before we talk about how to add subtitles in iMovie, let’s take a look at these frequently asked questions, which will help you understand what you can and can’t do in iMovie when it comes to adding subtitles.

Can you add subtitles in iMovie without fade?

It’s easy to add subtitles in iMovie, but there is a downside. Subtitle will fade in and fade out, and there is no option to disable the fade effect. In many cases, iMovie users want the subtitles to just appear and disappear with no fade. The good news is you can add subtitles to your video without fade using Filmora, an easy-to-use video editor with a rich set of basic and advanced features.

Can you add background to subtitles in iMovie?

iMovie offers a few options for users to make subtitles more visible and easier to read. You can change subtitle font, size and color. You can also add a black border around the text. However, these options are sometimes not enough.

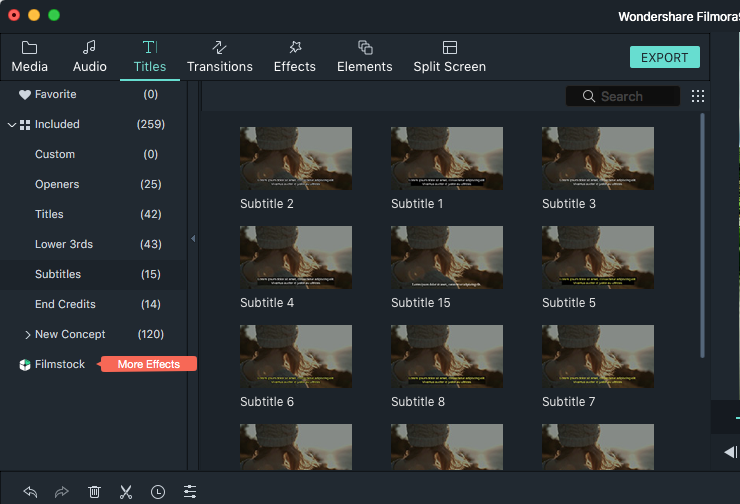
To create complete separation between subtitles and the footage, the best solution is to add black background to subtitles. Unfortunately, iMovie doesn’t allow you to do so. To easily add black background to subtitles, you can use the above-mentioned Filmora. There’s a preset for all the subtitle effects it provides. Filmora’s Subtitles 1 effect, for example, comes with black background that users can easily delete or resize it.

Can you add closed captions in iMovie?

Let’s start with another question. What are the differences between subtitles, open captions and closed captions?

  • Subtitles are used when the audience of your video can hear the audio. And they may still want the dialogue displayed on screen. Or, they don’t understand the language and want the translation provided.
  • If you add captions in iMovie, you assume that the viewer can’t hear anything and needs a text description. Captions can include dialogue, sound effects and more.
  • Closed captions exist as a separate track. Viewers can turn them off and on.
  • Open captions are burned directly into the video. And you can’t turn them off.

iMovie allows users to add both subtitles and captions using its Titles tool. How to add closed captions in iMovie? Unfortunately, iMovie currently doesn’t support closed captions.

How do I add SRT files to iMovie?

SRT (or SubRip Subtitle) files are used to store video subtitle information. iMovie doesn’t support SRT. Users can’t add subtitles in iMovie by importing a SRT file.

Note: iMovie does a good job of providing users with a couple of options for creating subtitles. But there are limits. To add subtitles to videos with more flexibility and options, you can check out this part of the article: An easier way to add subtitles to your video.


How to add subtitles in iMovie 10, 9, 8 and 7

When you add subtitles in iMovie, the steps may vary depending on the iMovie version you use.

How to add subtitles in iMovie 10

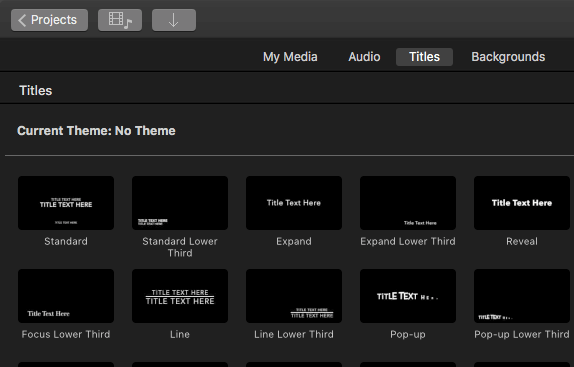
Step 1. In iMovie, choose the Titles tab. There are a number of title effects such as like Standard Lower Third, Reveal and Focus. Grab your favorite effect and drop it down on top of your video layer.

Titles tab

Step 2. Now you are able to edit the text on the title effect. You can choose to type your subtitles or captions into iMovie word by word manually. Or, you can copy and paste text from a document or an SRT file available.

With the text layer selected, you will be presented with options to change font, color and formatting of your subtitles.

type or paste your subtitles

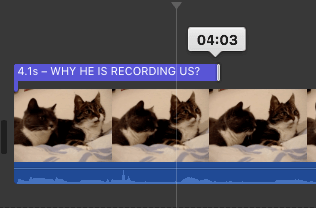
Step 3. It’s important to make your subtitles or captions synced up with the audio. To do so, you can change subtitle duration by dragging the edges of the text layer in the timeline.

change subtitle duration

Step 4. Now you’ve probably finished inserting the first sentence of the subtitles and tweaked the text settings based on your need. You need to add subtitles in iMovie sentence by sentence. Here’s a tip that can help.

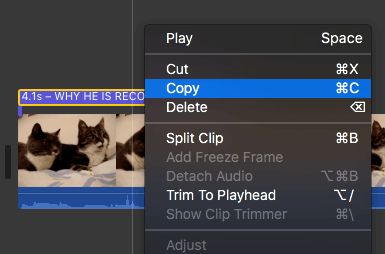
Tip: Select the text layer, control-click and select Copy. Paste it where you like. This will paste the same iMovie title effect with the same formatting. As a result, you don’t have to go back and redo it all. All you need to do is to edit text and adjust duration.

Copy

These steps apply to iMovie 10 and later, including iMovie 10.1.11, the latest version of March 2019.

How to add subtitles in iMovie ’08 (7.0), iMovie ’09 (8.0) and iMovie ’11 (9.0)

Step 1. In iMovie, open your project. Highlight a section of the footage. Click the T icon in the menu bar (below the Viewer window). You can find title effects like Lower Third 1, Upper Third, etc. To preview an effect, just hover your mouse over it.

click the T icon

Step 2. Select and drag the title effect of your choice to the timeline over the top of your clip.

Step 3. In the Viewer, you are able to type your subtitle. To change the text color, size or font, select Show Fonts > Change Fonts. Note that you need to highlight the text to be able to apply the changes.

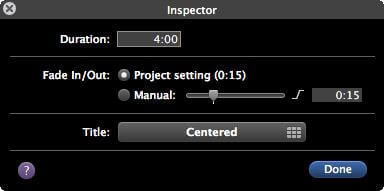
Step 4. When you add subtitles in iMovie, if you want to change subtitle duration, double-click the text layer, which will bring up the Inspector window. There, you can edit the duration. You can also change the fade time.

the Inspector window

How to add subtitles in iMovie on iPad or iPhone

If you’d like to do it on your iPhone or iPad, you can follow the following steps.

Step 1. Open the iMovie app for iOS on your mobile device.

Step 2. In your iMovie project, play the video clip. When the first sentence in the audio ends, tap the pause button. Select Action > Split. Repeat the same thing with the rest sentences.

Step 3. Tap the Titles button at the bottom of the screen and choose the title effect you need. Type the subtitles. Reposition subtitles if needed.

add subtitles in iMovie on iPhone

Step 4. When you finish adding subtitles or captions, tap Done in the top left corner of the screen.


An easier way to add subtitles to your video

If you have no idea how to subtitles in iMovie, the instructions above can help. As a matter of fact, there is a more efficient way to add subtitles to videos. With video editor Filmora, things can be even easier.

  • Offer more 100+ title and text effects for subtitles adding and customizing
  • Offer both basic & advanced video editing features
  • Support all common video, audio and image formats
  • Support up to 100 media layers
  • Come with full 4K support
  • Provide a rich selection of effects, templates and more with regular updates
  • Allow special effects such as split-screen, green-screen and face-off
  • Export videos optimized for uploading to YouTube, Vimeo, etc.

Free Download Windows Filmora
 
Free Download Mac Filmora

Below is how to add subtitles and captions using this video editor.

Step 1. In the said video editor, open your project. Choose Titles.

In the upper left part of the window, you can find lists of effects. Select Included > Subtitles. You can find the preset for all the subtitle effects.

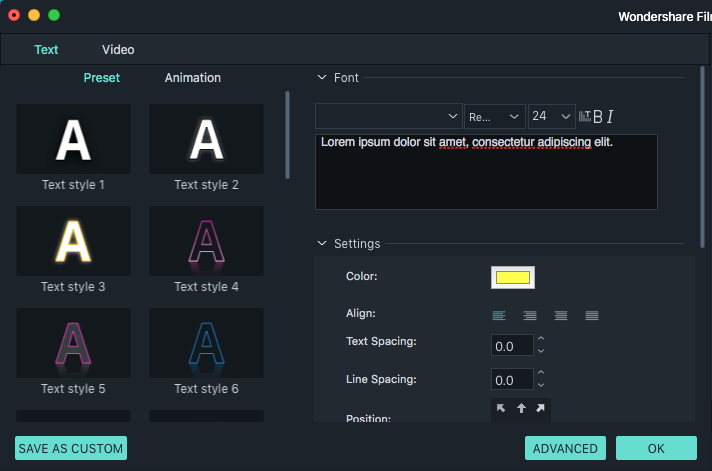
Step 2. Select an effect and drag it to the timeline. Double-click the subtitle layer, which will bring up a new window. Type or paste your subtitle there. You can select the text style and animation on the left of the window, select the subtitle font, size, bold and italic on the top of the window.

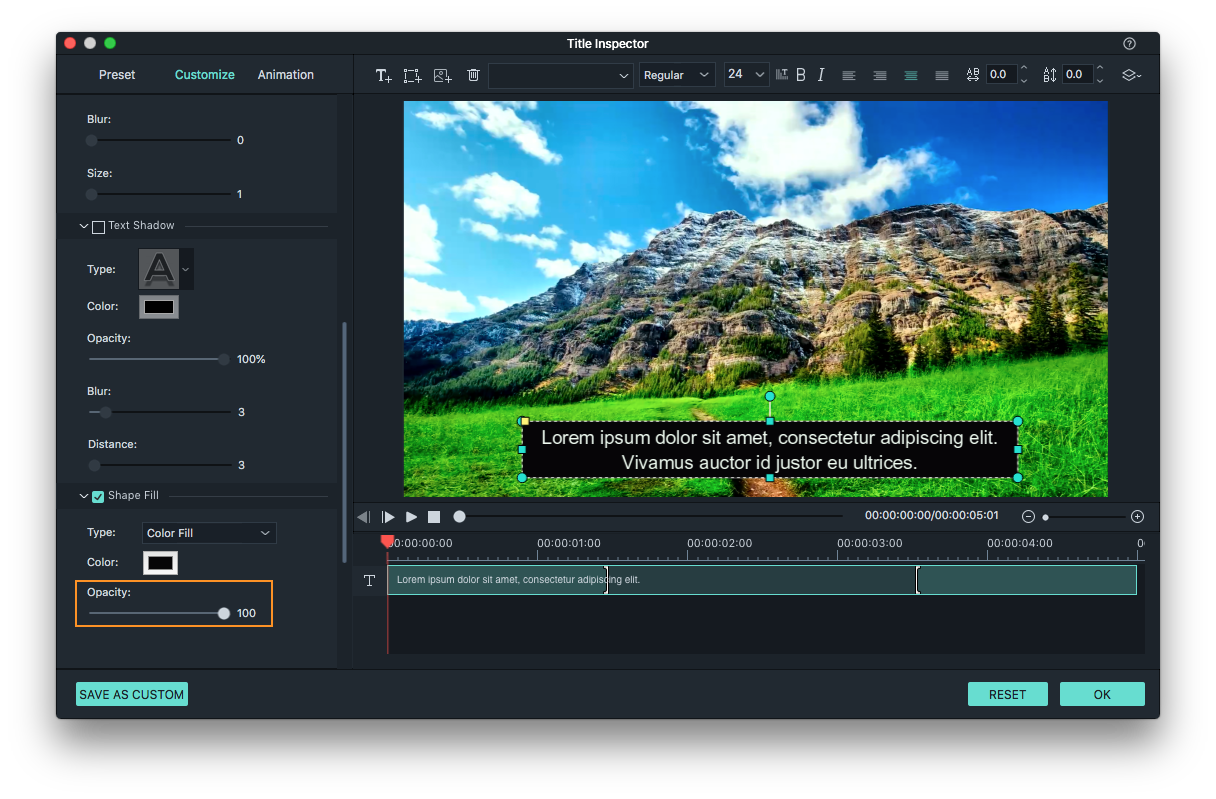
Tip: If you need to remove the black background with the subtitles, click the Advanced button in the aforesaid window, navigate to Shape Fill, adjust Opacity value to zero.

Step 3. In the timeline, find the right position for when a dialogue begins and move the subtitle player to make sure they sync up properly.

As mentioned above, you can make it much easier to add subtitles by copying and pasting the first subtitle layer you have created. This way, you don’t have to set text formatting over and over again with each subtitle line you add.


Conclusion

This article talks about the best way on how to add subtitles in iMovie on Mac, iPad and iPhone. If iMovie doesn’t meet your need, other video editing software with more functions and options can help. Filmora is among the best of them. With it, you can effortlessly insert subtitles in videos in desired ways without limit and do other cool stuff.

Related Post

By |2020-11-06T17:28:15+08:00November 6th, 2019|Tags: |

4 Ways to Rotate a Video on YouTube for 2020

YouTube offers the most convenient way for us to share and watch videos online, so we can talk to the world in term of videos. But occasionally, we need to rotate a video on YouTube when uploading or while watching, so the video can be viewed in a good angle that accords with our habit.

Then how to rotate a video on YouTube? Today, we collect 4 solutions to rotate a YouTube video that proved to be feasible in 2020.

Can YouTube’s Video Editor Rotate Videos?

No, it doesn’t support rotating videos on YouTube anymore.

You may have your own YouTube Channel and know that YouTube has its own video editor to edit videos before or after the uploading. Yes, it is true that YouTube Video Editor used to support rotating video on YouTube, but now, it doesn’t support any more, neither the YouTube Studio Beta or Classic Creator Studio support doing orientation changes on YouTube.

Here is the screenshot of earlier YouTube Studio version, there was a rotate feature located by the side of Trim button.

creator youtube studio

But now in the latest YouTube Video Editor, this Rotate feature is removed, you are not allowed to rotate videos on YouTube directly.

latest youtube studio

But never mind, here we will introduce 4 ways to rotate YouTube videos that are uploaded by yourself or by others, no matter you are using Mac or Windows PC.

4 Ways to Rotate a Video on YouTube

#1 The Best Way to Rotate YouTube Video

(For Mac & Windows users, for videos uploaded by yourself)

The best and easiest way to rotate a video on YouTube is always using a professional video editor, even it allows you to customize your video beyond your imaginations, like Filmora 9.

Filmora 9 is a dedicated video editing software to create and edit videos without limits, it is easy to use but powerful to build in various editing features. Also, it is available both for mac and windows users.

Main Feature of Filmora 9:

  • Allow editing video, audio and image;
  • Offer basic editing feature: crop, trim, rotate, add text & titles, etc.;
  • Add effects;
  • Support advanced editing: color tuning, pan & zoom, reverse, stabilize video, record screen, split screen, video snapshot, etc.;
  • Support action cam editing;
  • Remove watermark from videos;
  • Export videos as various formats after editing;
  • Share video online

Steps to Rotate YouTube Video with Filmora

  1. Go to Filmora 9 page, download and install the program;
    Free Download Windows Filmora
     
    Free Download Mac Filmora
  2. Launch the program, drag and drop your YouTube video to the program;import youtube filmora
  3. Then drag and drop the YouTube video to timeline as following;rotate in filmora 02
  4. Double click on the video in the timeline area, then the editing panel will appear, choose the buttons for Rotate, you can now rotate the video in 90, 180 and 270 degrees. And don’t forget to click “OK” to save the orientation changes.rotate filmora 03
  5. Go to Export, select a video format to save the rotated video.

In the case you want to edit YouTube videos shared by others, you need to download the YouTube videos with online YouTube Downloader first (refer to the method 2), then use this program to rotate.

#2 Rotate YouTube Video Online Free

(For Mac & Windows users, for videos uploaded by yourself and others)

Also, you can rotate YouTube video online free. The greatest benefit of rotating YouTube videos online lies in its capability to rotate both videos that uploaded by yourself or others. To rotate a video on YouTube from others for offline watching, you need to download the YouTube video first by using an online tool, then use another online video editor to finish the rotating.

If you need to rotate YouTube video from others, we recommend downloading the YouTube video with y2mate, it is an online free YouTube Downloader allowing users to download videos from YouTube in different resolutions (1080p, 720p, 360p, etc.), even you can utilize this tool to export YouTube videos as MP3 format. While for the online video editor to rotate this YouTube video, ezgif video editor is always a good option to do the rotation.

Steps to Rotate YouTube Video Online Free

(For users who just need to rotate their own YouTube videos, please go ahead to the step 2.)

  1. Go to y2mate, input the YouTube URL into the program and download it;y2mate
  2. Go to ezgif rotate video, click “Choose File” and choose the YouTube you have downloaded or saved on your computer, then click “Upload Video”;rotate video online free
  3. Then choose to rotate video 90, 180 or 270 degrees, also select the output format. Click the “Rotate Video” to start the rotation;rotate video online free 03
  4. Finally, you need to click the “Save” button to download the rotated video to your device;

#3 Rotate YouTube Video in iMovie (Free)

(For Mac users, for videos created by yourself)

If you are a mac user, you can use the macOS built-in program—iMovie to rotate the YouTube videos on mac free. iMovie allows users to create videos from image, add image/audio to video, add transitions, crop, clip, rotate, stabilize, trim, adjust colors, etc. It offers all basic editing features to create a video as needed.

Steps to Rotate YouTube Video in iMovie

  1. Go to Finder>Applications>iMovie, launch iMovie;
  2. Then drag and drop the video you want to upload to YouTube to the timeline as following;add youtube videos
  3. Then select the video you added to timeline, you will be able to edit the file. Click on the Cropping icon, you will be allowed to rotate clockwise or counterclockwise;rotate youtube imovie
  4. After the rotating, go to File>Share>YouTube, to share the rotated video directly to YouTube, or you can save as file according to your need.

Note: If you want to rotate a YouTube video that is uploaded by others, you need to download the YouTube video (recommend using iFunia YouTube Downloader) first, then rotate the video in iMovie.

#4 Rotate Video on YouTube with Windows Movie Maker (Free)

(For Windows users, for videos created by yourself)

If you are a Windows user and work on OS earlier than Windows 10, you can utilize Windows Movie Maker to rotate YouTube videos. But it is pitiful that it is not available anymore, you will have no chance to download the official Windows Movie Maker from Microsoft today. Though Microsoft offers a new program called Photos app to view and edit videos, the “Rotate” feature is only enabled when you are editing photos. So, in conclusion, you can utilize Windows Movie Maker to rotate videos if you have installed, but if you don’t, you also lose the chance to utilize a free Windows-bundled program to rotate videos, you will need to search within the Microsoft Store.

Steps to Rotate YouTube Videos in Windows

  1. Launch Windows Movie Maker;
  2. Go to File>Add videos and photos, choose your YouTube video to import;rotate video in movie maker 01
  3. Then click on the Rotate buttons to rotate left or right;rotate movie maker 02
  4. Once ready, go to File>Save Movie to export the rotated video.

Note: If you want to rotate a YouTube video that is uploaded by others, you need to download the YouTube video (recommend using y2mate or Winx YouTube Downloader) first, then rotate the video in iMovie.

Conclusion

It is true that there are so many software or services available to rotate a video on YouTube, if you want to make this quite easy but still require high on editing features, Filmora, the best video editing software is absolutely the best choice. If rotating a video on YouTube is just a one-off matter, you can try those online or free programs already installed on your device.

Related Post

By |2021-03-16T09:53:16+08:00October 24th, 2019|Tags: |
Go to Top