YouTube offers the most convenient way for us to share and watch videos online, so we can talk to the world in term of videos. But occasionally, we need to rotate a video on YouTube when uploading or while watching, so the video can be viewed in a good angle that accords with our habit.
Then how to rotate a video on YouTube? Today, we collect 4 solutions to rotate a YouTube video that proved to be feasible in 2020.
Can YouTube’s Video Editor Rotate Videos?
No, it doesn’t support rotating videos on YouTube anymore.
You may have your own YouTube Channel and know that YouTube has its own video editor to edit videos before or after the uploading. Yes, it is true that YouTube Video Editor used to support rotating video on YouTube, but now, it doesn’t support any more, neither the YouTube Studio Beta or Classic Creator Studio support doing orientation changes on YouTube.
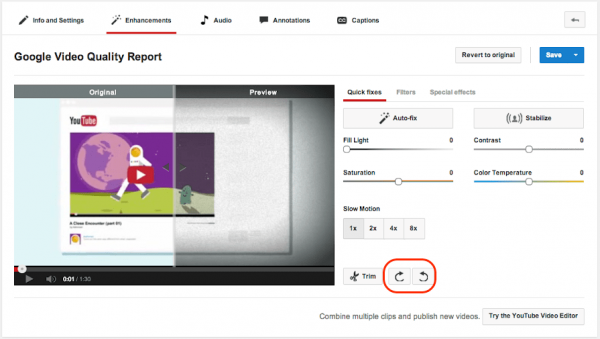
Here is the screenshot of earlier YouTube Studio version, there was a rotate feature located by the side of Trim button.
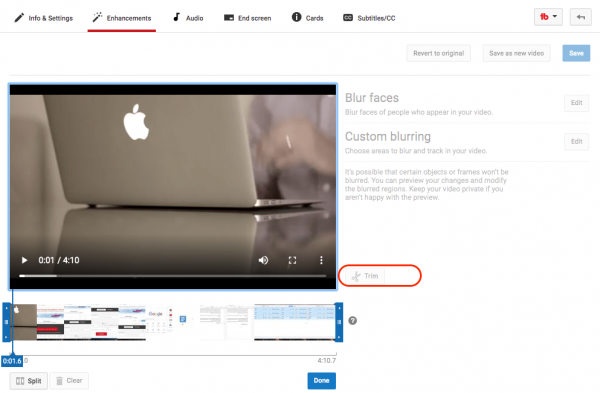
But now in the latest YouTube Video Editor, this Rotate feature is removed, you are not allowed to rotate videos on YouTube directly.
But never mind, here we will introduce 4 ways to rotate YouTube videos that are uploaded by yourself or by others, no matter you are using Mac or Windows PC.
4 Ways to Rotate a Video on YouTube
#1 The Best Way to Rotate YouTube Video
(For Mac & Windows users, for videos uploaded by yourself)
The best and easiest way to rotate a video on YouTube is always using a professional video editor, even it allows you to customize your video beyond your imaginations, like Filmora 9.
Filmora 9 is a dedicated video editing software to create and edit videos without limits, it is easy to use but powerful to build in various editing features. Also, it is available both for mac and windows users.
Main Feature of Filmora 9:
- Allow editing video, audio and image;
- Offer basic editing feature: crop, trim, rotate, add text & titles, etc.;
- Add effects;
- Support advanced editing: color tuning, pan & zoom, reverse, stabilize video, record screen, split screen, video snapshot, etc.;
- Support action cam editing;
- Remove watermark from videos;
- Export videos as various formats after editing;
- Share video online
Steps to Rotate YouTube Video with Filmora
- Go to Filmora 9 page, download and install the program;
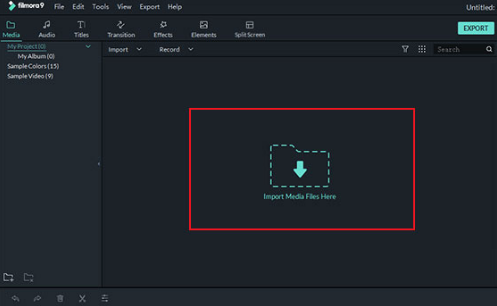
- Launch the program, drag and drop your YouTube video to the program;
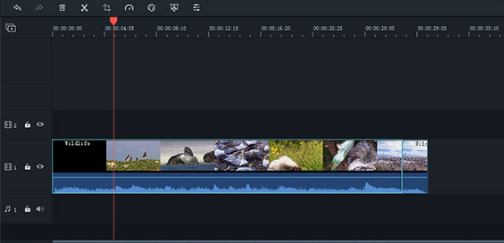
- Then drag and drop the YouTube video to timeline as following;
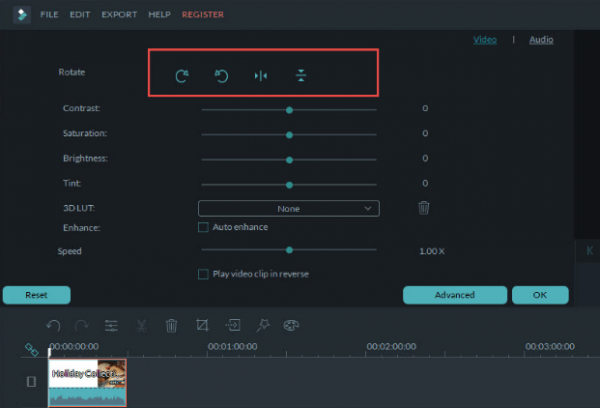
- Double click on the video in the timeline area, then the editing panel will appear, choose the buttons for Rotate, you can now rotate the video in 90, 180 and 270 degrees. And don’t forget to click “OK” to save the orientation changes.
- Go to Export, select a video format to save the rotated video.
In the case you want to edit YouTube videos shared by others, you need to download the YouTube videos with online YouTube Downloader first (refer to the method 2), then use this program to rotate.
#2 Rotate YouTube Video Online Free
(For Mac & Windows users, for videos uploaded by yourself and others)
Also, you can rotate YouTube video online free. The greatest benefit of rotating YouTube videos online lies in its capability to rotate both videos that uploaded by yourself or others. To rotate a video on YouTube from others for offline watching, you need to download the YouTube video first by using an online tool, then use another online video editor to finish the rotating.
If you need to rotate YouTube video from others, we recommend downloading the YouTube video with y2mate, it is an online free YouTube Downloader allowing users to download videos from YouTube in different resolutions (1080p, 720p, 360p, etc.), even you can utilize this tool to export YouTube videos as MP3 format. While for the online video editor to rotate this YouTube video, ezgif video editor is always a good option to do the rotation.
Steps to Rotate YouTube Video Online Free
(For users who just need to rotate their own YouTube videos, please go ahead to the step 2.)
- Go to y2mate, input the YouTube URL into the program and download it;
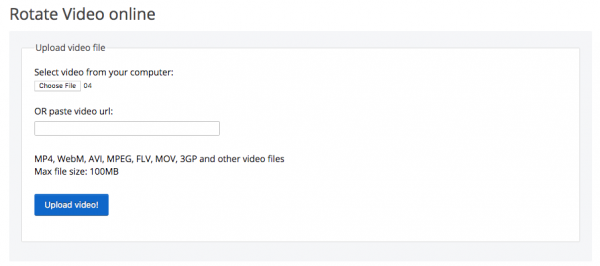
- Go to ezgif rotate video, click “Choose File” and choose the YouTube you have downloaded or saved on your computer, then click “Upload Video”;
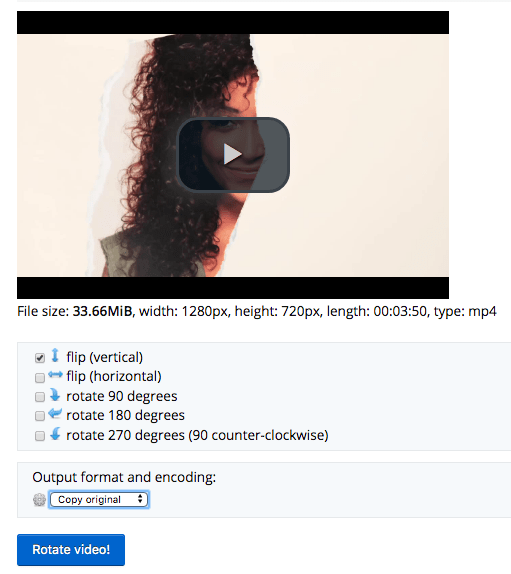
- Then choose to rotate video 90, 180 or 270 degrees, also select the output format. Click the “Rotate Video” to start the rotation;
- Finally, you need to click the “Save” button to download the rotated video to your device;
#3 Rotate YouTube Video in iMovie (Free)
(For Mac users, for videos created by yourself)
If you are a mac user, you can use the macOS built-in program—iMovie to rotate the YouTube videos on mac free. iMovie allows users to create videos from image, add image/audio to video, add transitions, crop, clip, rotate, stabilize, trim, adjust colors, etc. It offers all basic editing features to create a video as needed.
Steps to Rotate YouTube Video in iMovie
- Go to Finder>Applications>iMovie, launch iMovie;
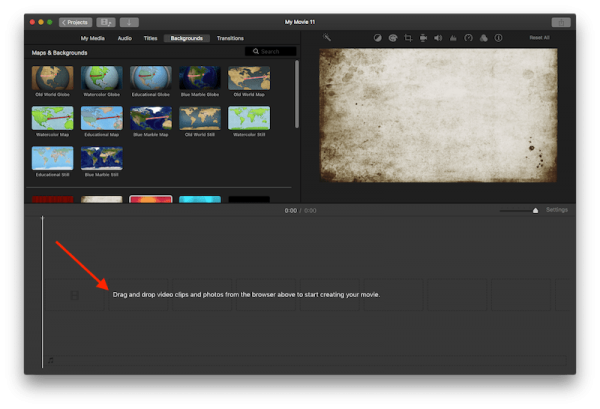
- Then drag and drop the video you want to upload to YouTube to the timeline as following;
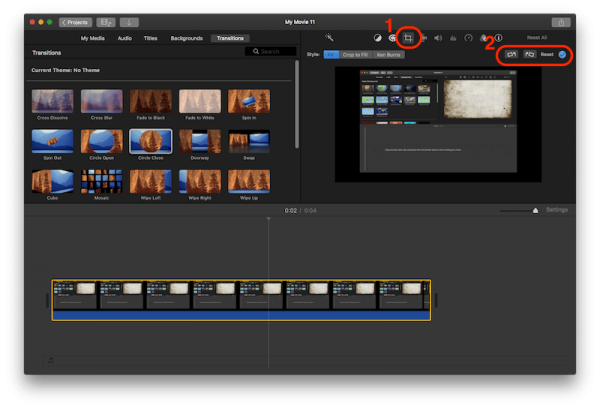
- Then select the video you added to timeline, you will be able to edit the file. Click on the Cropping icon, you will be allowed to rotate clockwise or counterclockwise;
- After the rotating, go to File>Share>YouTube, to share the rotated video directly to YouTube, or you can save as file according to your need.
Note: If you want to rotate a YouTube video that is uploaded by others, you need to download the YouTube video (recommend using iFunia YouTube Downloader) first, then rotate the video in iMovie.
#4 Rotate Video on YouTube with Windows Movie Maker (Free)
(For Windows users, for videos created by yourself)
If you are a Windows user and work on OS earlier than Windows 10, you can utilize Windows Movie Maker to rotate YouTube videos. But it is pitiful that it is not available anymore, you will have no chance to download the official Windows Movie Maker from Microsoft today. Though Microsoft offers a new program called Photos app to view and edit videos, the “Rotate” feature is only enabled when you are editing photos. So, in conclusion, you can utilize Windows Movie Maker to rotate videos if you have installed, but if you don’t, you also lose the chance to utilize a free Windows-bundled program to rotate videos, you will need to search within the Microsoft Store.
Steps to Rotate YouTube Videos in Windows
- Launch Windows Movie Maker;
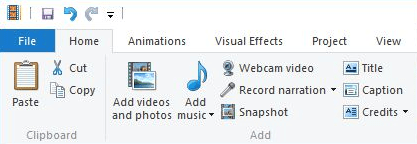
- Go to File>Add videos and photos, choose your YouTube video to import;
- Then click on the Rotate buttons to rotate left or right;
- Once ready, go to File>Save Movie to export the rotated video.
Note: If you want to rotate a YouTube video that is uploaded by others, you need to download the YouTube video (recommend using y2mate or Winx YouTube Downloader) first, then rotate the video in iMovie.
Conclusion
It is true that there are so many software or services available to rotate a video on YouTube, if you want to make this quite easy but still require high on editing features, Filmora, the best video editing software is absolutely the best choice. If rotating a video on YouTube is just a one-off matter, you can try those online or free programs already installed on your device.
Related Post
Best 9 Windows Movie Maker Alternative with No Watermark (2020 Update)
Windows Movie Maker is regarded as the king video creation and editing software with all basic functions in its time. [...]
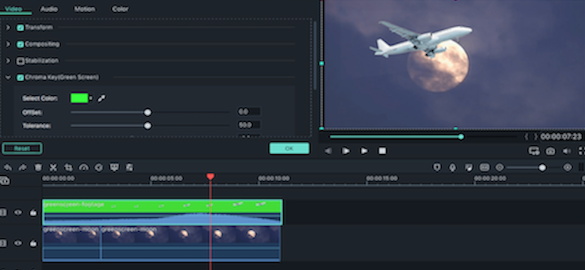
Beginners Guide: How to Make a Green Screen for Free
You must have heard that most movie clips are made with green screen, big-budget films like Hollywood blockbusters are no [...]
14 Best Video to GIF Software in 2020 (with High Quality)
In recent years, GIF, as the favorite way to express emotion for the young people, is gaining more popularity. When [...]



It is really pitiful that YouTube Studio doesn’t allow rotating the video. Also, I like the previous Classic Video Editor much more, just get used to it.
Rotating video is quite easy, but we still need a tool. I need to edit videos very often, I’d like using a professional one.